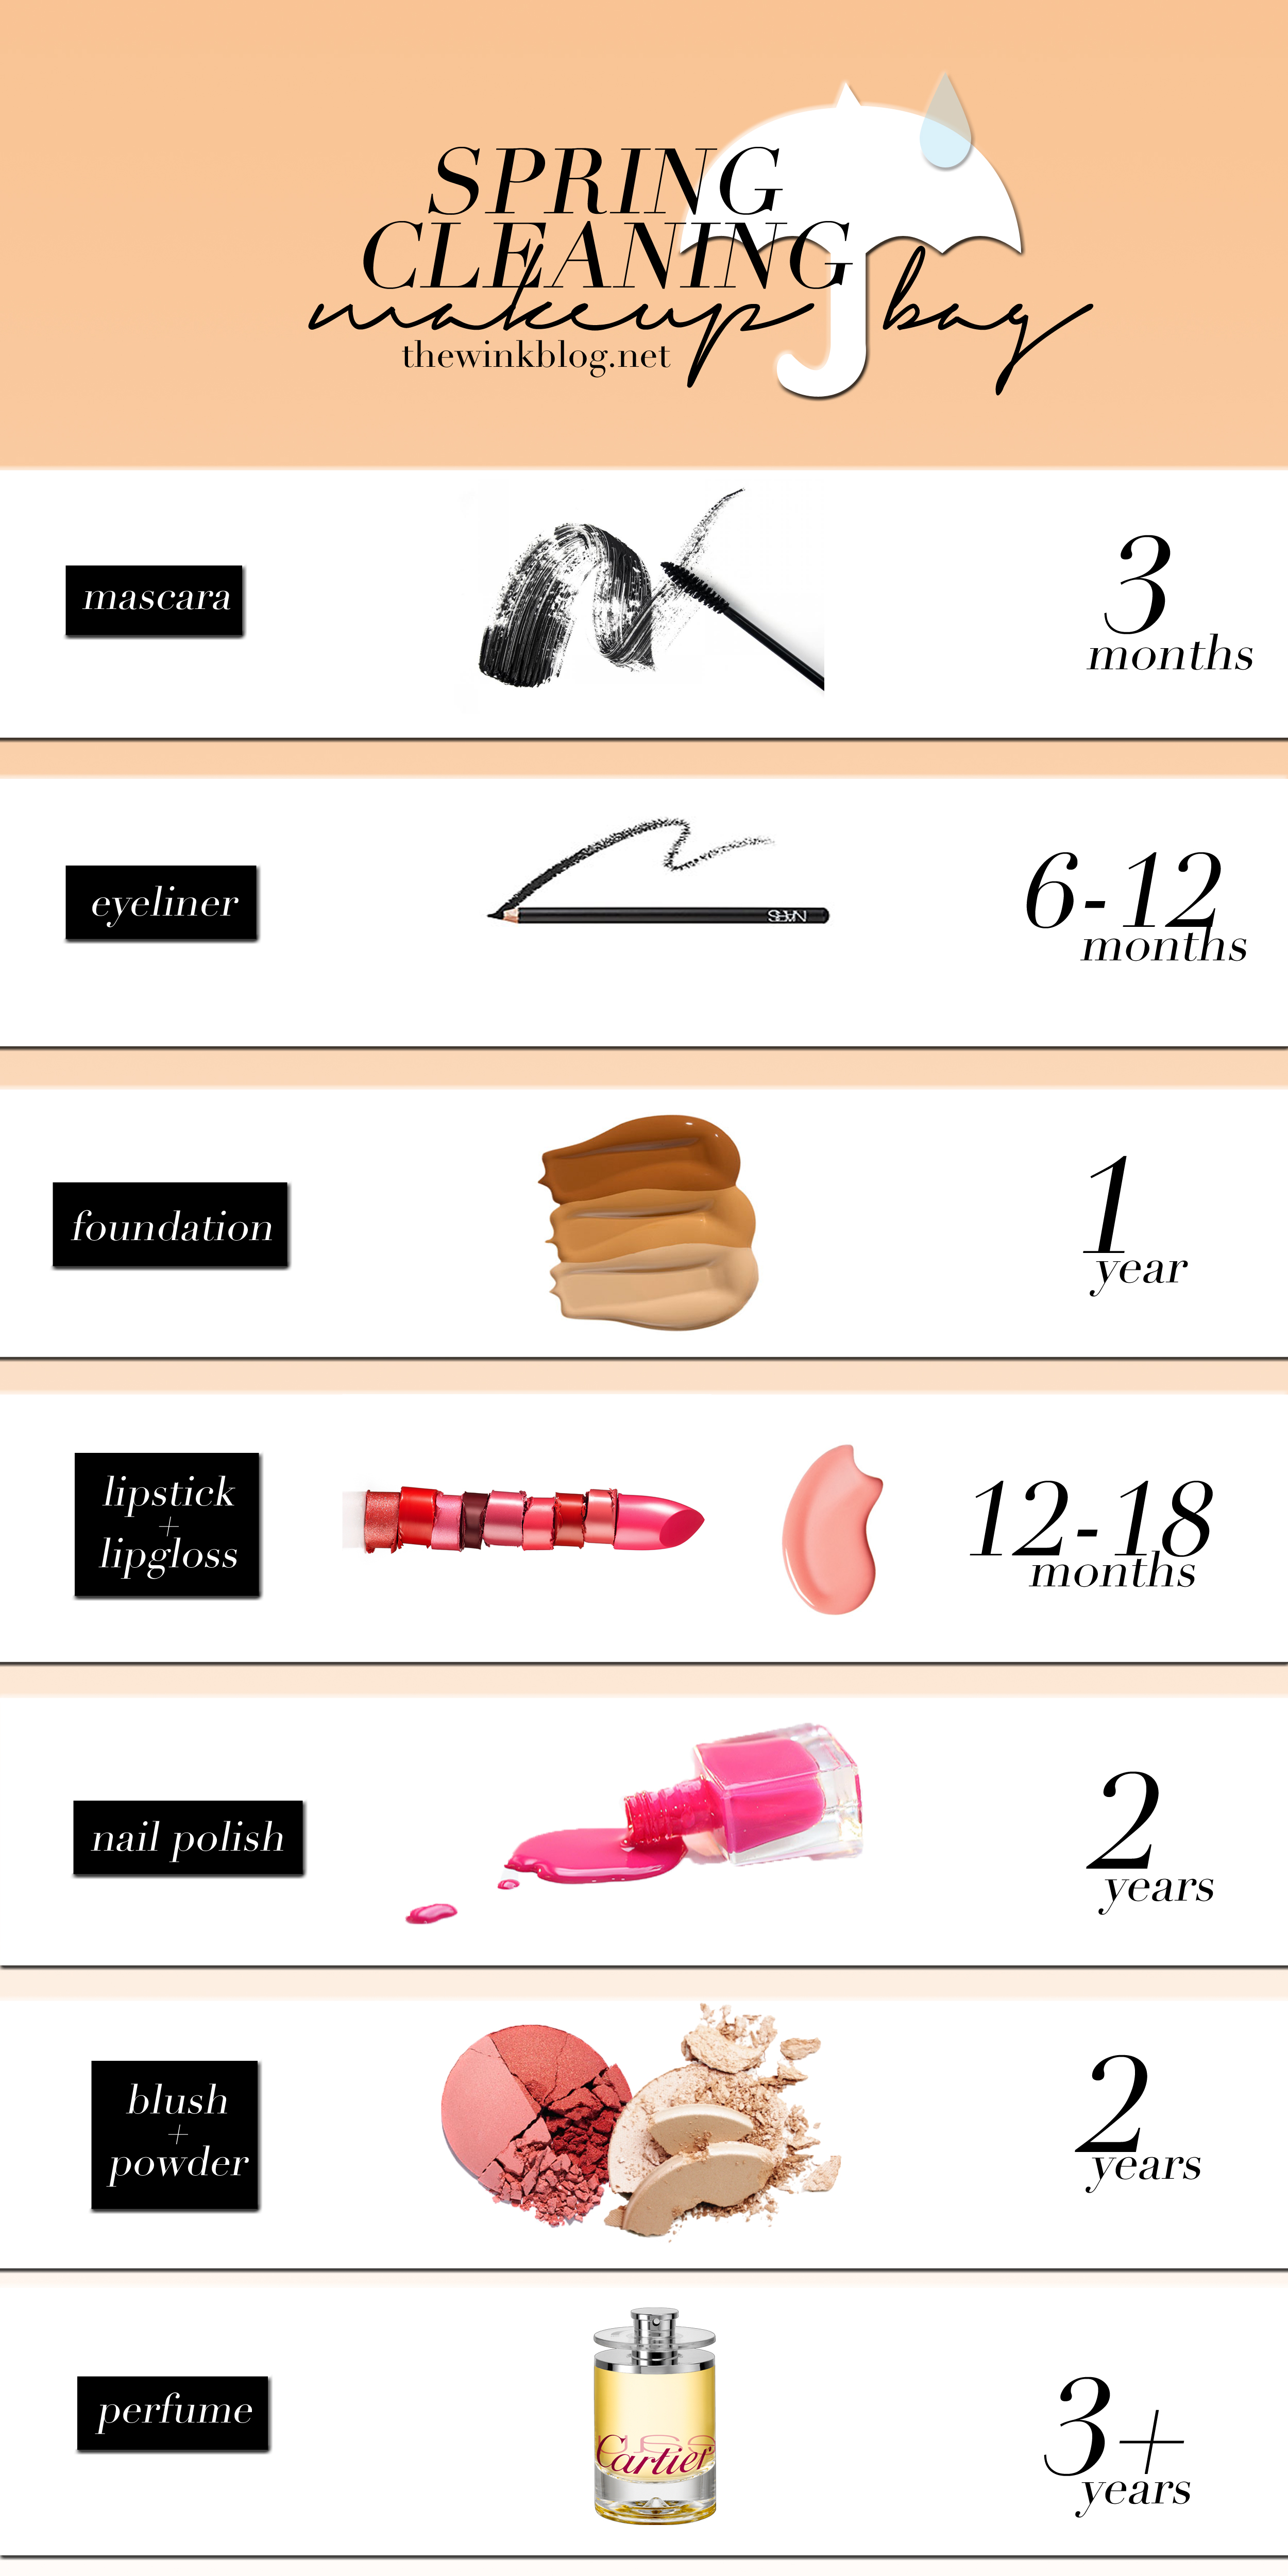
Happy Spring, gals! We are kicking off the season the right way by tackling some much-needed Spring cleaning. What better place to start than your makeup bag? It’s time to dig deep and throw away that glitter liquid eyeliner from that Halloween costume three years ago (you know the one) and restock your bag with some fresh supplies. I’ve put together a handy infographic for you to reference while you clean!
Mascara: I know, I know. It seems a bit ridiculous to feel like you’re constantly throwing away and repurchasing tubes and tubes of mascara. But trust me – three months is more than enough time for some nasty bacteria to grow and wreak havoc on your precious peepers.
Eyeliner: Again, with a product that touches your eyes, you need to be diligent in keeping it fresh and sanitary. With pencil eyeliners you can be a little more lax, because it frequently gets sharpened and may be used less than your everyday mascara.
Foundation: As soon as your liquid foundation separates into viscous layers that can’t be shaken out, it’s time to chuck it. Most liquid and cream foundations have a shelf life of about one year.
Lipstick + Lipgloss: Lipgloss usually starts to get pretty funky and separate out after about a year. Lipstick lasts longer than lipgloss and you can comfortably use a tube for about a year and a half. However, as soon as your lipstick starts to smell funny or change consistency, you should get rid of it.
Nail polish: You know you have bottles in your nail polish collection from middle school. And unless you are still currently in middle school, throw them away. If nail polish is kept properly stored in a cool, dry place it can easily last two years. Once it starts getting thick or changing colors, though, you should toss it.
Blush + Powder: Kept dry, blush and powder compacts are extremely shelf stable and will easily last 2 years. It’s hard to tell when they’ve expired, so a good rule of thumb is to ditch your old compacts after a couple of years. Chances are you will have gone through most of it in that time anyway.
Perfume: A great fragrance will last you many years, so it’s a good investment. Fragrances that contain citrus are less shelf stable due to the acidity of the oils. Eau de parfum has a longer shelf life than Eau de toilette due to the higher concentration of fragrance. You’ll know when the color clouds and darkens and the scent changes that it’s time to throw away.
Can you believe it’s almost the end of March? 2014, you’re flying by! Last Saturday, Sawyer and I took a day trip over to Alcatraz Island. Neither of us had been before and were dying to go after getting into Alcatraz on Fox a couple of years ago (why was that show cancelled?! It was so good!). Here’s a few shots from our trip!
The views of SF were amazing but it was WINDY. Just looking at this picture gives me chapped lips.
As native Mainers, we’re no strangers to lighthouses. However, Alcatraz lighthouse was the first lighthouse built on the west coast!
They had most of the cells roped off, but a few you could go into and walk around. They even opened up solitary confinement and we went inside. So scary!
Alcatraz Island is now a sanctuary for many wild sea birds, like the Western Gull. There are no natural predators on the island, so the birds can hatch their young in safety.
Speaking of birds… Sawyer and I were walking back to the train on the mainland and happened upon the parrots of Telegraph Hill! For those of you unfamiliar with them, they’re a flock of wild parrots who live and roam free in inner-city San Francisco. I got to hand-feed them and it kinda made my whole day.
They were so gentle. Can I come feed you guys every day? I don’t even care if I become that crazy bird lady…
There’s nothing worse than being in a jam and not having a quick solution. Over the years I’ve picked up a few quick tricks to help me out of sticky situations. Here’s a list of my favorite life-changing (and life-saving) beauty hacks!
In a pinch, Advil can work as an awesome cheek stain. Just lick the coating on the pill, press into cheeks and quickly blend.
Look fresh and awake by putting a few drops of Visine in each eye. Then, swipe the residual powder blush left on your brush over your brow bones. Visine also works wonders on reducing the redness of a pimple!
Got a dress you love to wear but can’t zip yourself? Tie a long piece of ribbon to a safety pin and fasten the pin to the zipper. Hold the zipper at the bottom with one hand and pull the ribbon up with the other. You can easily remove the safety pin and ribbon once the dress has been zipped.
Ran out of nail polish remover but can’t stand the sight of your chipped polish? Paint a quick coat of clear top coat on your nails and rub off. This might take a few tries but it definitely works!
To enhance the curl of your eyelashes, heat your metal eyelash curler under your blow dryer for 5-10 seconds. Make sure to test how hot the curler is before touching to your eyelid!
Lost an earring back? Use a pencil eraser. Cut the eraser off the pencil and stick onto the post for a makeshift back.
Heels half a size too big? Use several (4-5) strips of moleskin or duct tape on the back of the heel for an easy (and cheap!) heel stop.
Before chucking that shattered blush/powder/eyeshadow/bronzer compact, try this quick fix! Mash up the smithereens until they’re powdery. Pour in a small amount of rubbing alcohol and mix until a paste forms. Press the paste into the compact using a flat-bottomed glass or bottle. Allow 24 hours for the alcohol to evaporate fully and voila! Your compact is as good as new!
For eyelashes that are extra thick, lengthened, and defined, apply one coat of mascara and tap some powder onto the tips of your eyelashes (using a Q-tip). Then add a second coat of mascara. The mascara sticks to the powder and makes for amazing lashes!
Make a grown-out shellac manicure look new again by painting glittery half-moons. The texture of the polish will disguise any bumpiness between the shellac and new nail growth.
What are some of your can’t-live-without beauty hacks?
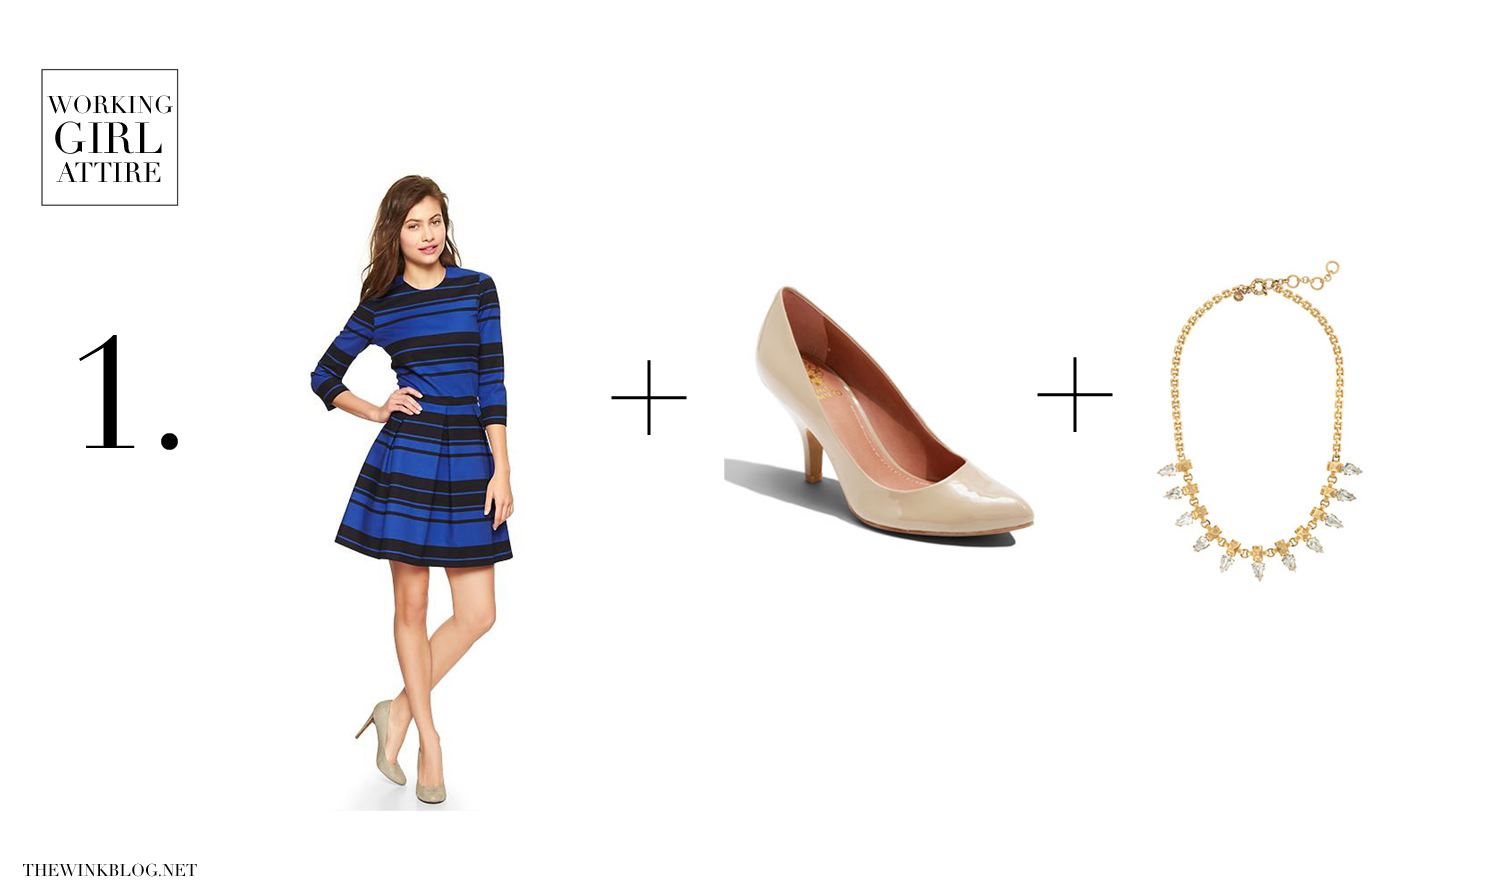
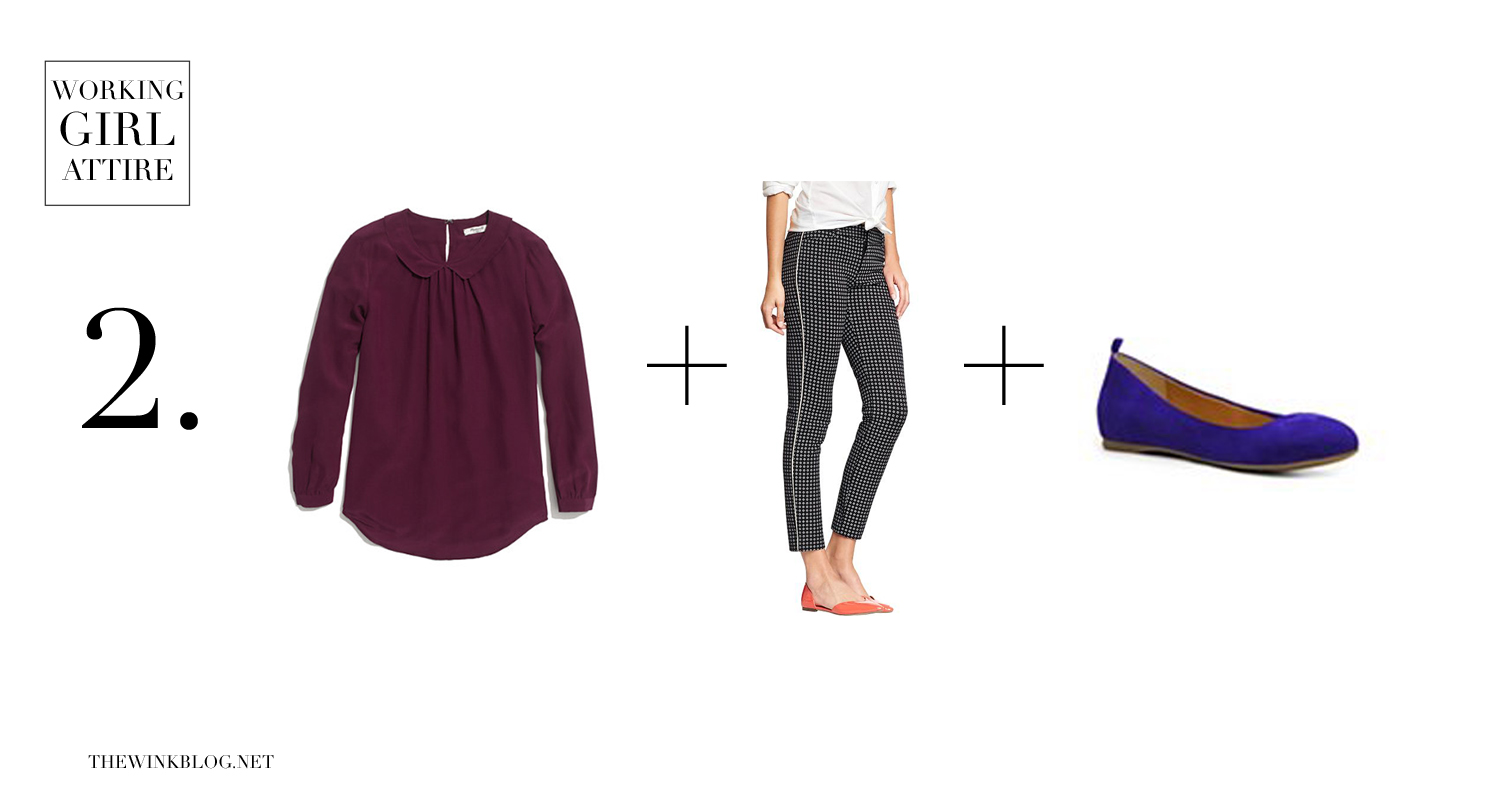
Navigating the sartorial waters of a business casual (yet erring on the side of business professional) working environment can be tricky. I’ve definitely made my fair share of missteps, but I’ve finally narrowed down my closet to a few classic pieces that I can easily mix and match. There’s no reason to feel confined to the basic black, white, and navy of the corporate world. I’ve come up with three fun-yet-professional examples of some working girl outfits from my very own closet!
With a dress this bold, go easy on the accessories with just a simple crystal necklace and nude patent leather pumps. I picked up this dress from the Gap because I loved the ultra-feminine shape juxtaposed with a slightly sporty pattern. Don’t forget the sheer pantyhose – I know it seems antiquated, but showing up bare-legged to a work environment is just plain unprofessional.
I’m not afraid to admit that I’m kind of obsessed with Old Navy. They recently came out with their Pixie trouser, which hits perfectly at the ankle bone and comes in fun-yet-work-friendly patterns and colors. I chose the trousers in a subtle black and white pattern and topped them with a silk blouse from Madewell. Finish the outfit with comfy suede flats in a bright color.
Nothing looks fresher than white-on-white for spring, so I chose a white silk blouse from Madewell and layered it under a white fitted blazer from H&M. Old Navy does it again with these ankle-zip skinny khakis, which are super comfy and super flattering on every body shape. Complete the look with these leopard calf-hair skimmers from Madewell.
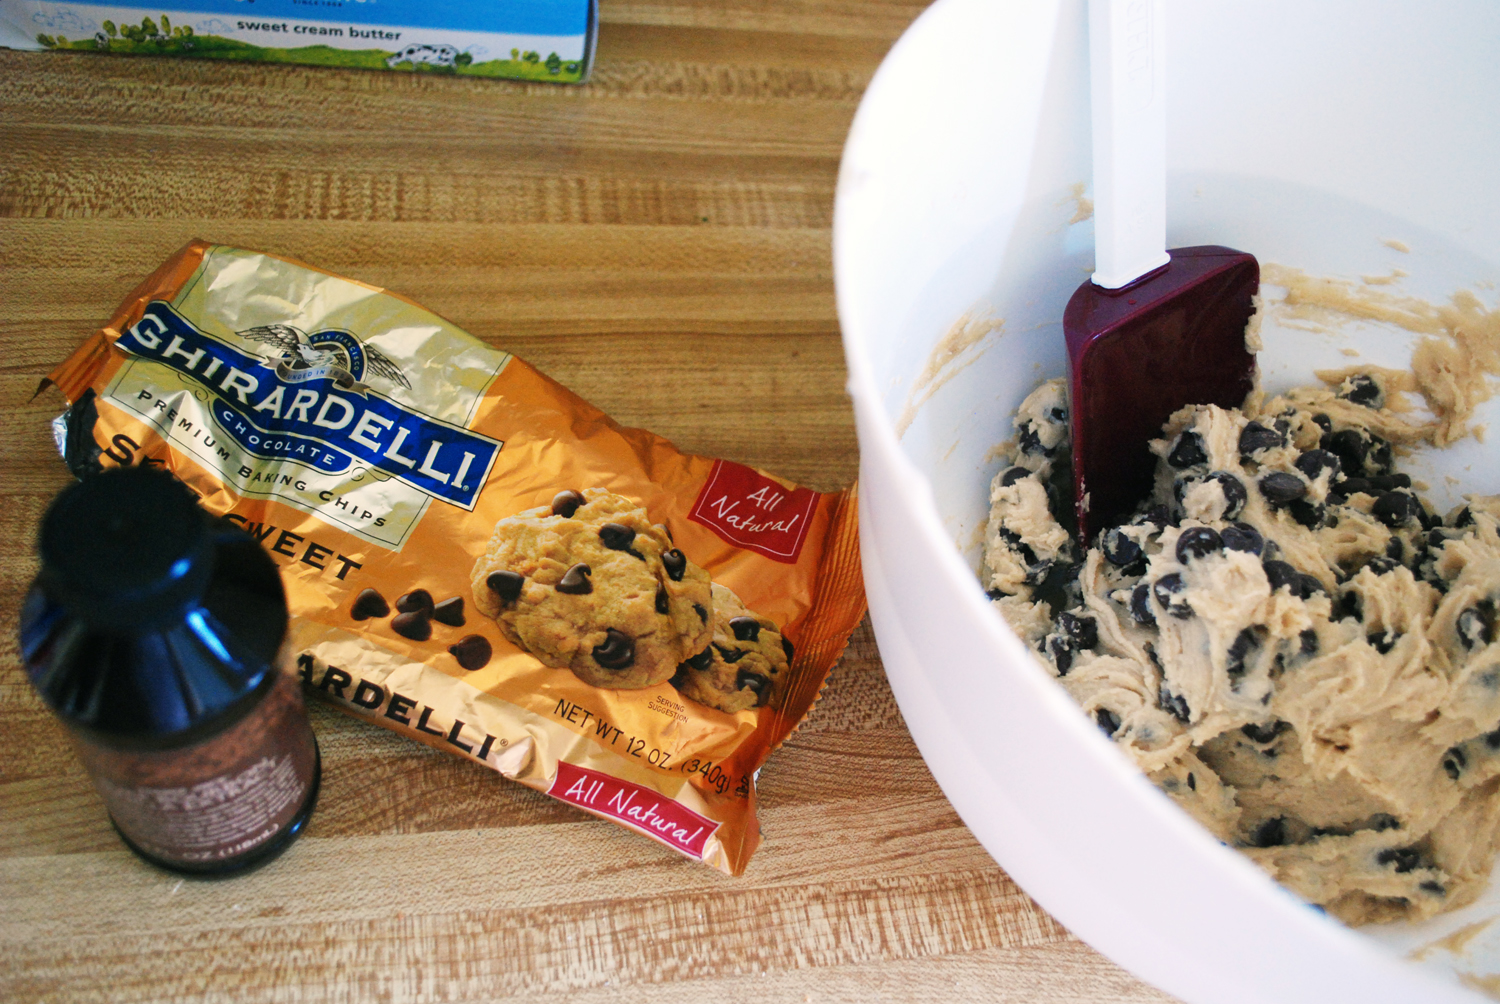
The concept seems simple enough, but actually finding the perfect chocolate chip cookie is no easy task. I’ve eaten many cookies in my day (confession: cookies are my favorite dessert/food/snack), so trust me when I say that these are the best. Maria, my good friend and co-owner of Kook’s Bakery in Portland, Maine, shared with me her secret recipe for the perfect chocolate chip cookies. It’s no joke, people. When a bakery owner gives you her recipe for cookies, you make (and eat) them without abandon.
Kook’s Bakery Chocolate Chip Cookies
Makes about 24 cookies
1/2 cup real butter, softened to room temperature
1/2 cup shortening
3/4 cup brown sugar
3/4 cup white sugar
2 eggs
1 tsp vanilla extract
2 1/4 cups flour
1 tsp baking soda
1/2 tsp salt
12 oz. bag semi-sweet chocolate chips
Cream the softened butter, shortening, brown sugar, and white sugar together in a mixing bowl.
Add the eggs and vanilla and mix.
Add in the flour, baking soda, salt, and chocolate chips, and mix together until just combined.
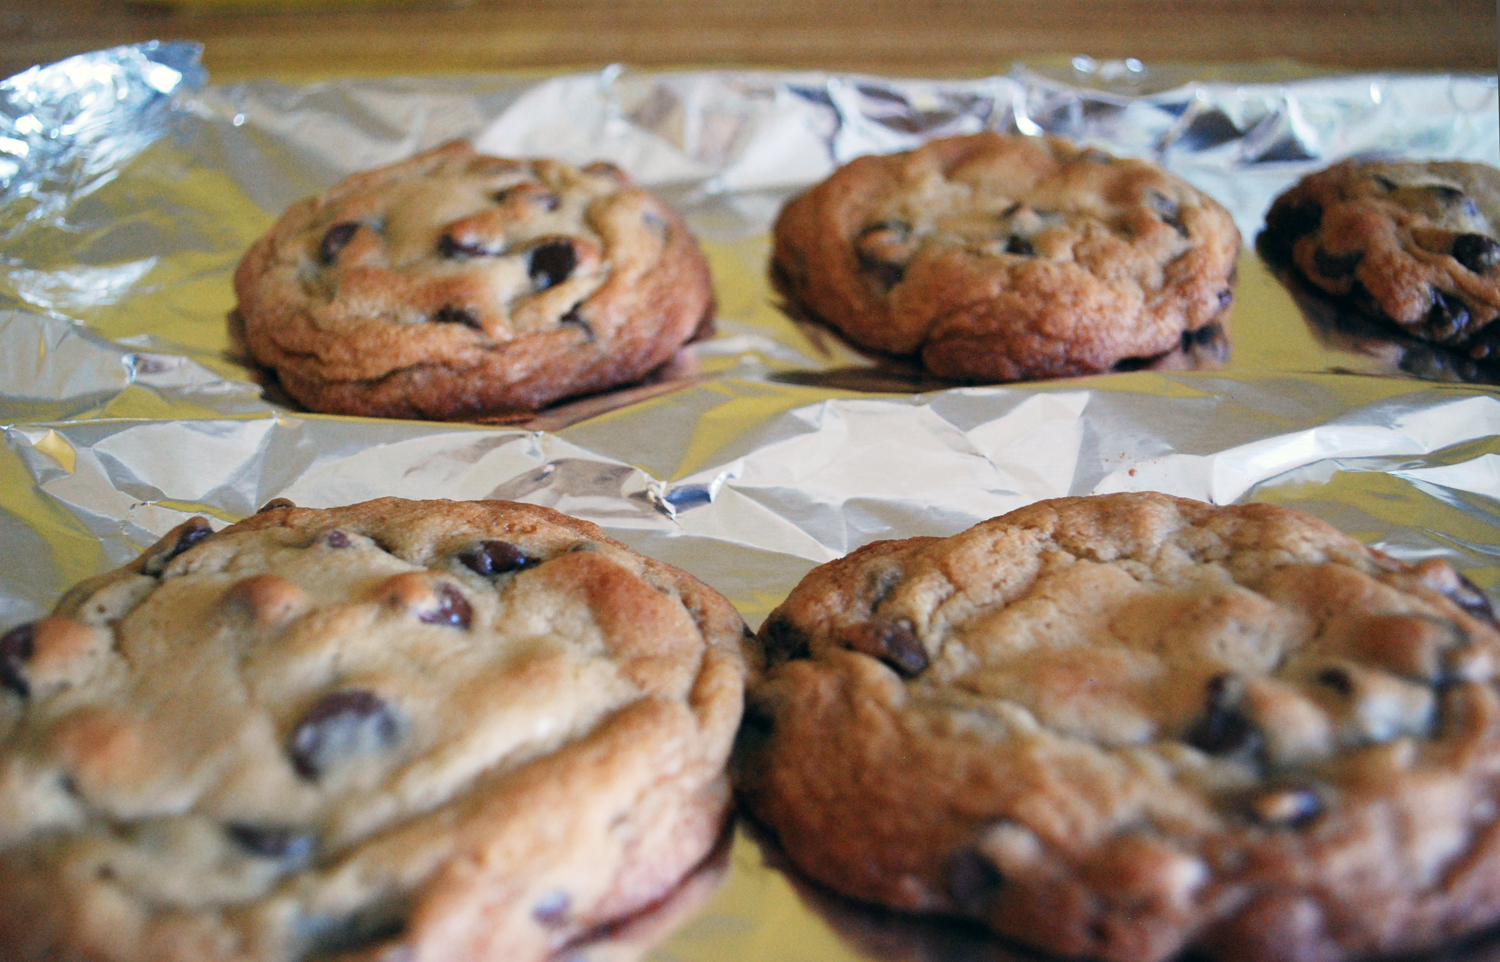
Drop large spoonfuls onto a cookie sheet lined with aluminum foil, spaced two inches apart.
Bake at 375 degrees for 7-9 minutes, or until edges are golden brown.
Transfer to a clean paper bag to cool. The paper helps absorb the excess oil!
The mark of a good cookie is a satisfied customer. If you live in the Portland area, check out Kook’s Bakery for delicious treats. Thanks, Maria!
It seems like every time I log onto Pinterest, a new “how to contour and highlight your face” pin pops up in my home feed. Many of these tutorials require several shades of concealer and a myriad of brushes, creams, and powders. For those of us who’d rather look natural and glowy than a bronzed glamazon (sorry Kim K.), I decided to come up with a contouring tutorial for an every day look. Check out my steps below!
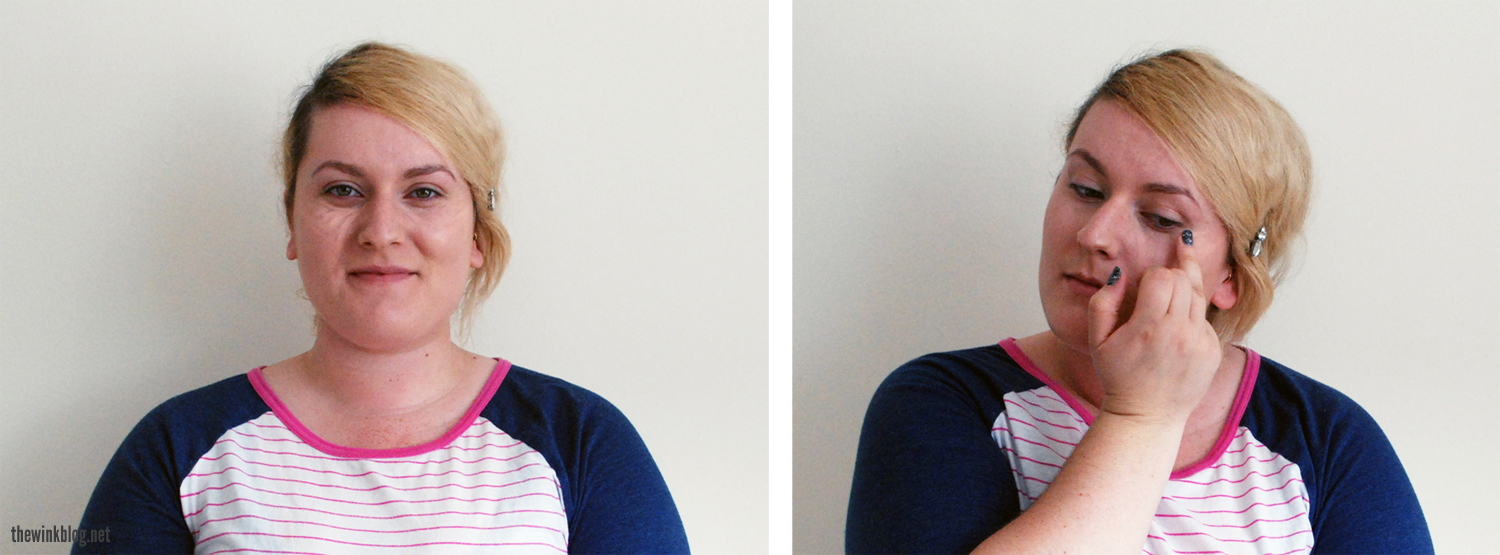
02. Using a highlighting concealer 1-2 shades lighter than your skin tone, draw an upside-down isosceles triangle underneath your eyes. The point of the triangle should extend down to the sides of your nostrils and the hypotenuse should extend along your cheekbone and out to your temple (and you thought you’d never use geometry!). Blend the concealer in with your ring finger.
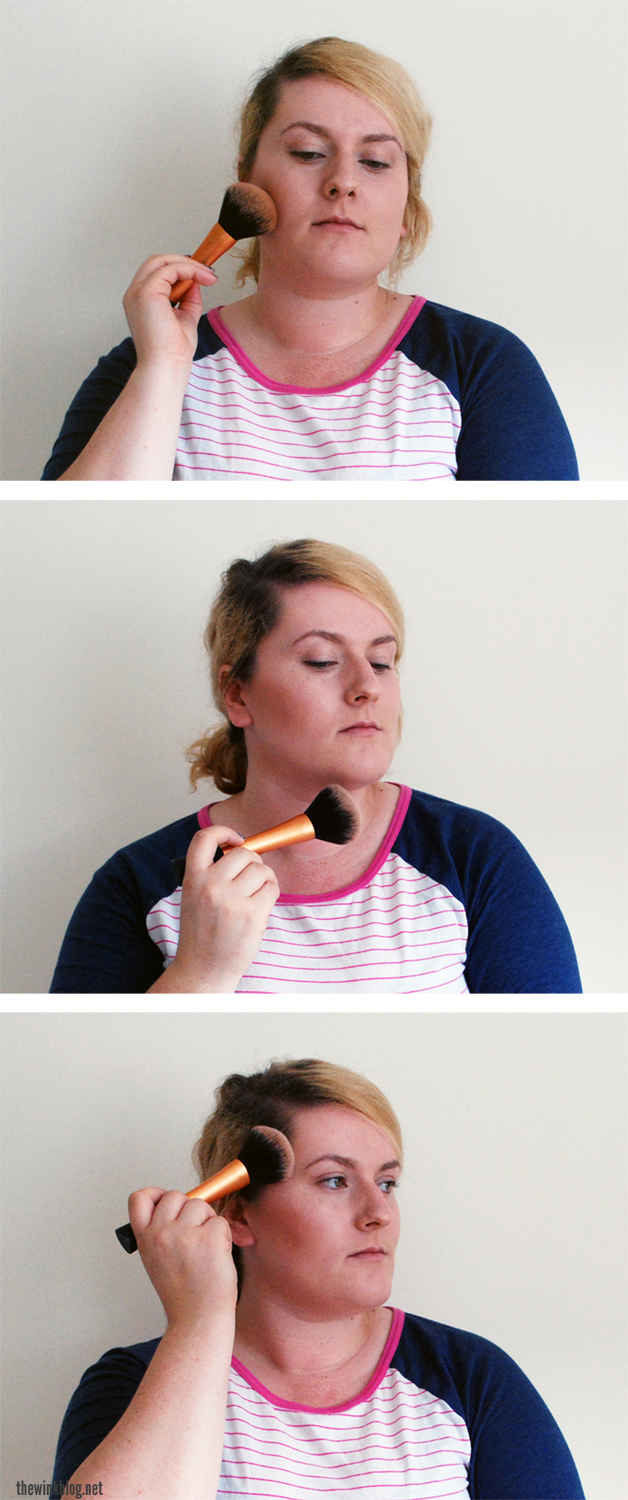
04. Swipe the residual bronzer underneath your jaw line.
05. Grab a bit more bronzer and blend into your temples and hairline. Swipe the brush down the bridge of your nose once.
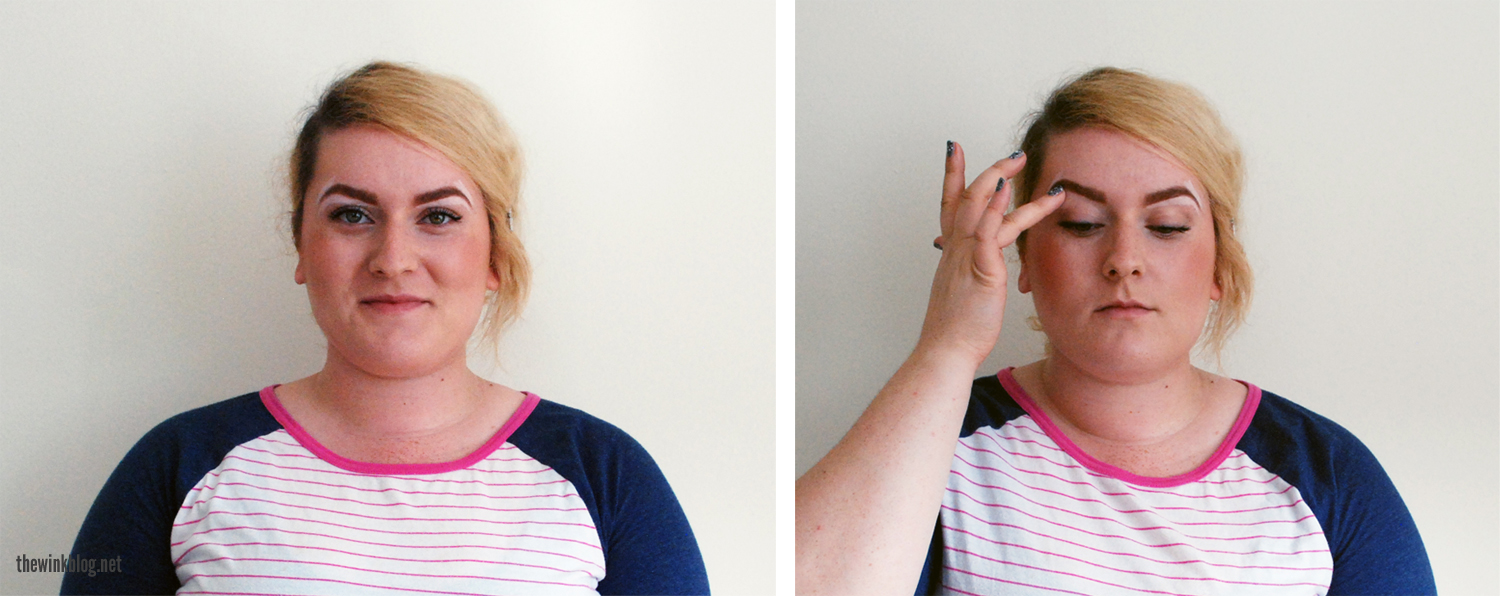
06. Apply the rest of your makeup (fill in brows, apply mascara and blush). Use a linen pink highlighting pencil to draw a thick line underneath your brows and above the outer half, past the arch. Blend, blend, blend with your ring finger (you don’t want it to look chalky).
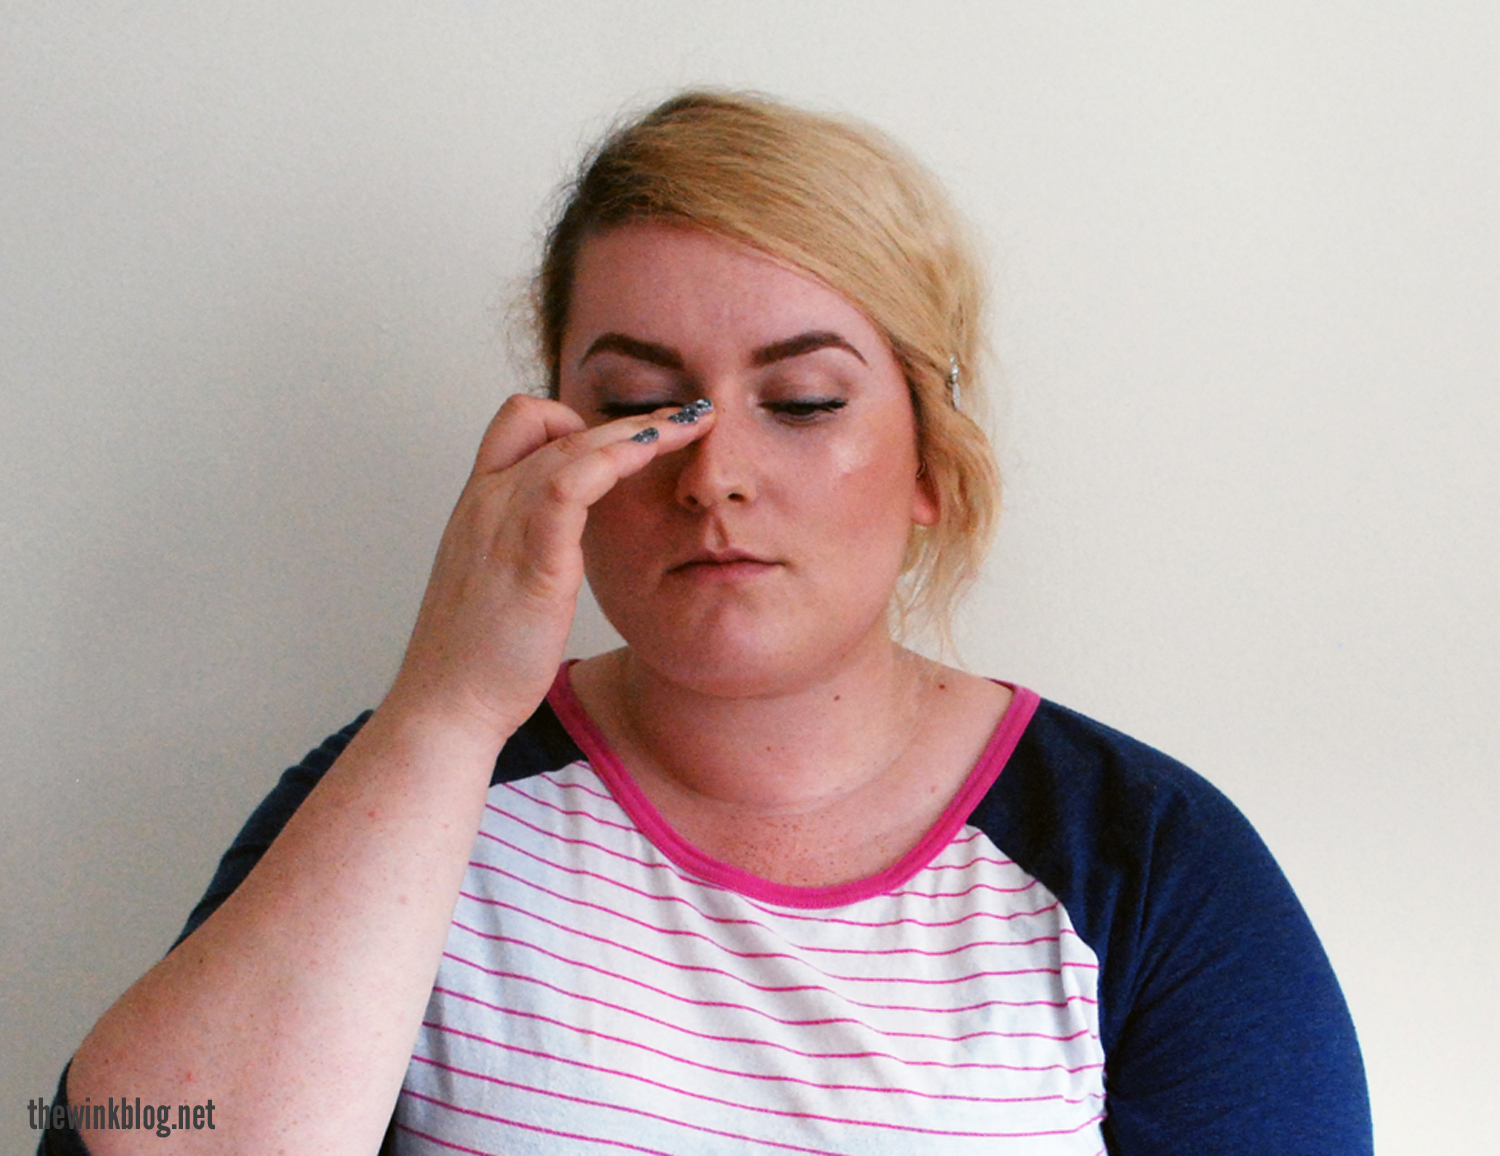
07. Swipe a shimmery champagne highlighter above your cheekbones, down the bridge of your nose, on your cupid’s bow, and on the inner corners of your eyes. Blend into skin for a seamless finish.
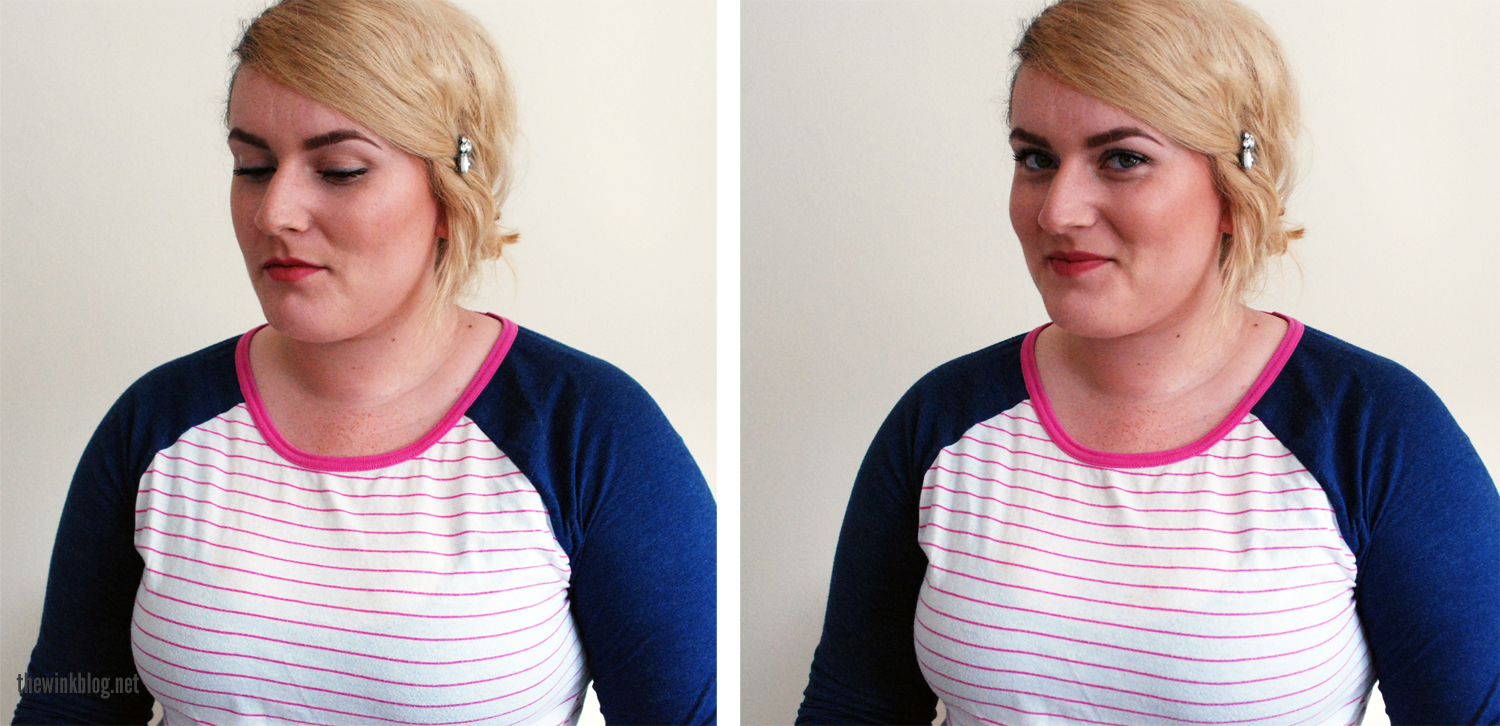
08. Finish the look with your favorite lipstick and you’re all done. Take that, Kim K.!