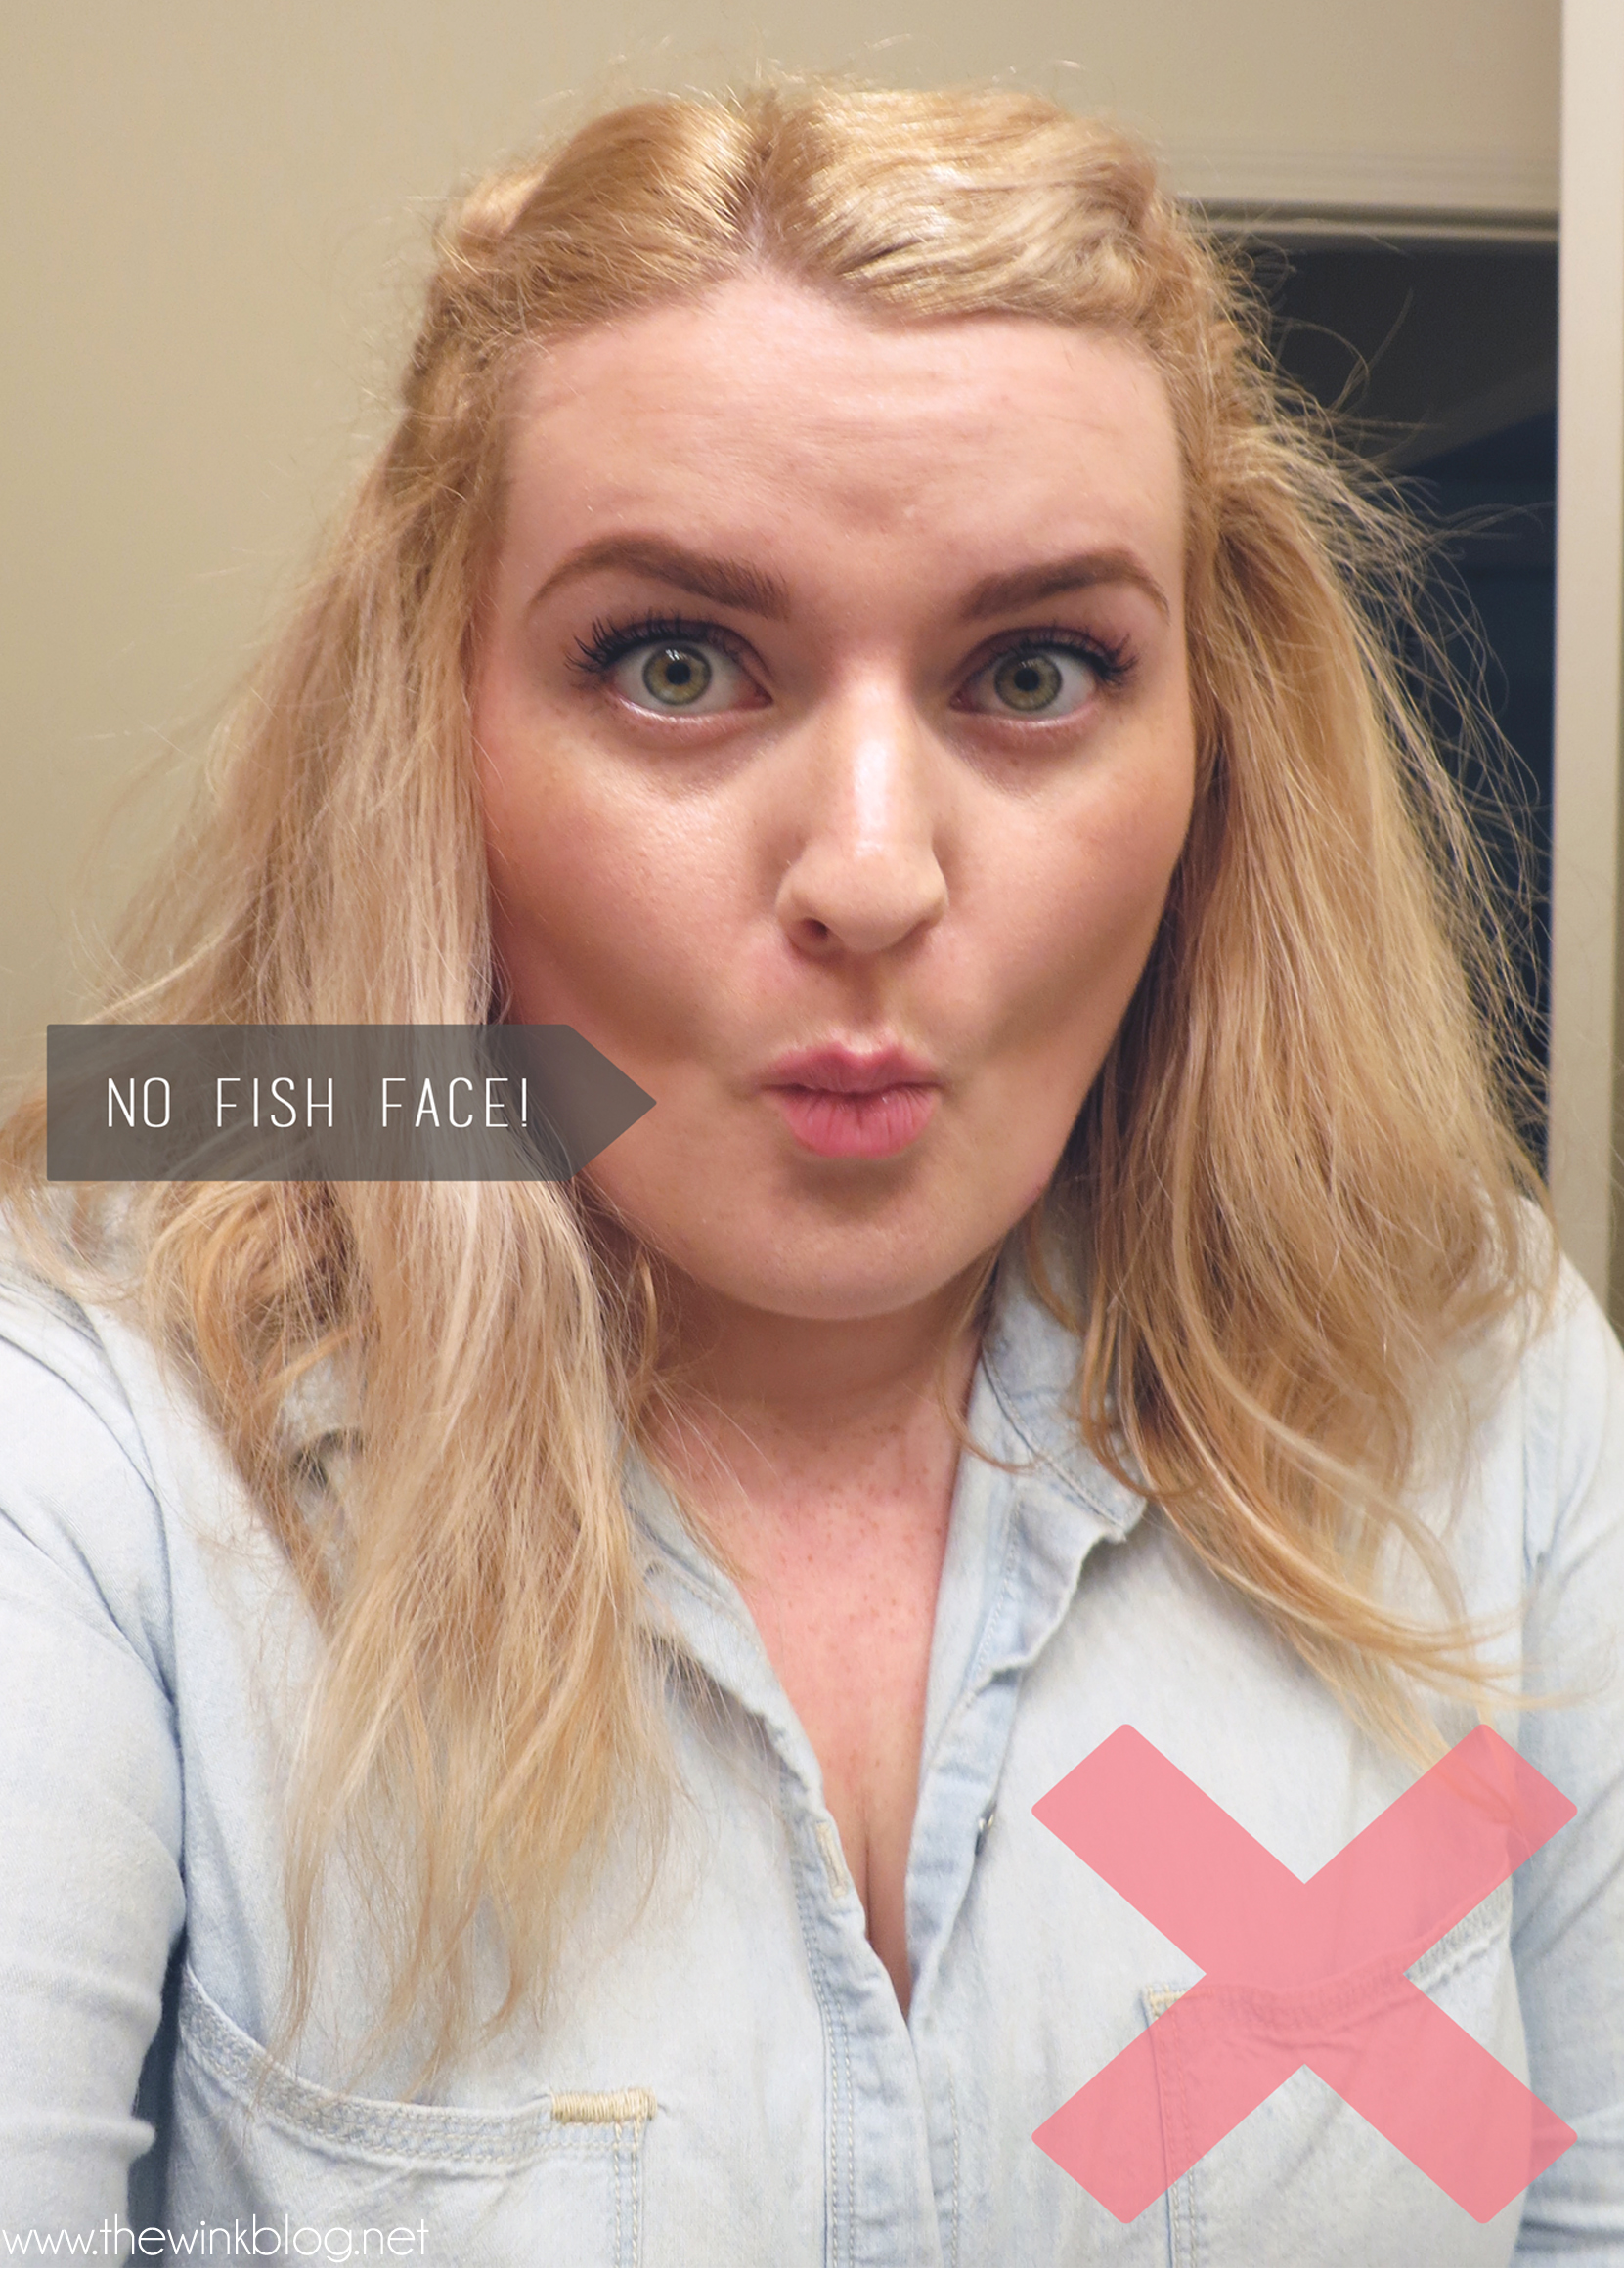
Before I dedicate a post to contouring and highlighting (coming soon!), I thought I’d focus on something even more basic… finding your cheekbones! Many people have fuller cheeks and actually finding the bone can be tricky. For those of you who don’t have prominent cheekbones, here’s an easy and fool-proof way to find your cheekbones without a single cheek-sucking fish face in sight!
The usual way we learn to find our cheekbones is to suck in our cheeks and make a fish face. This technique doesn’t always work, however, and you can end up with less-than-strategic patches of bronzer on your face (not cute).
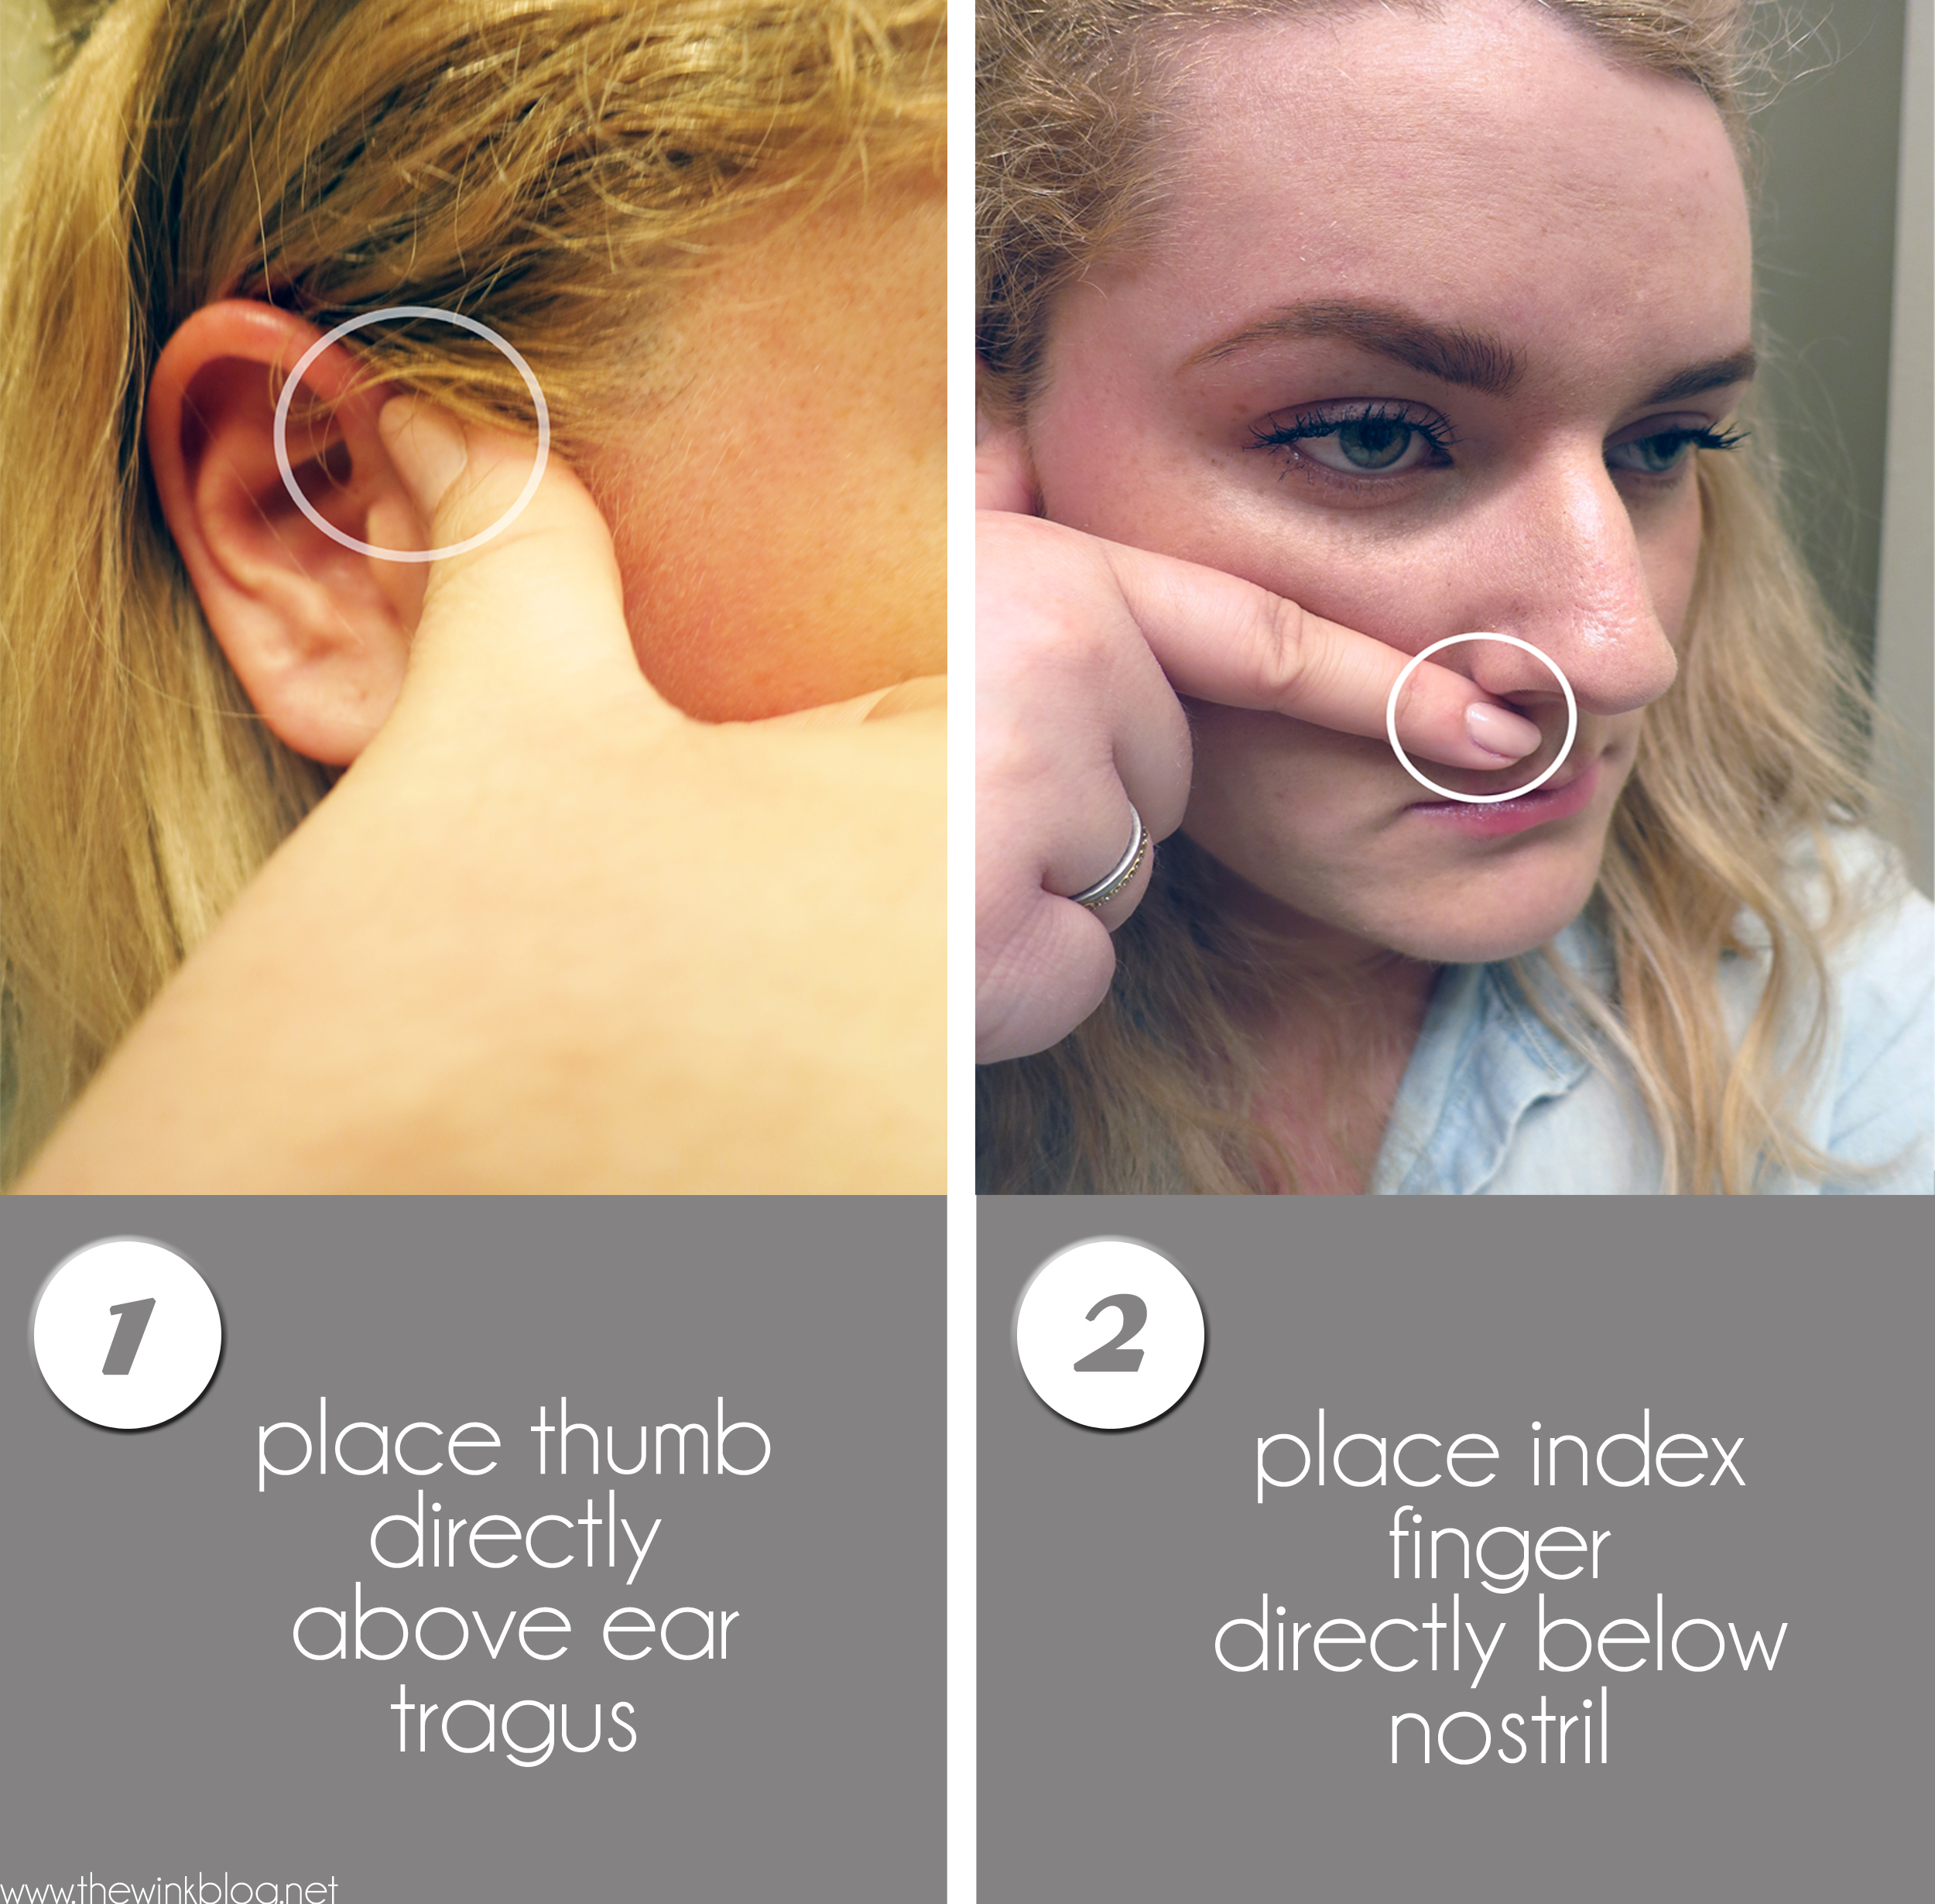
In order to correctly locate your cheekbones, place your thumb directly above your ear tragus (the little nub that sticks out). Then, place your index finger directly below your nostril. This line that your hand creates is exactly where every person’s cheekbone is located on their face. The zygomatic bone (cheekbone) articulates with the mandible right above the tragus and articulates with the maxilla below the nostril on every person, no matter their face shape.
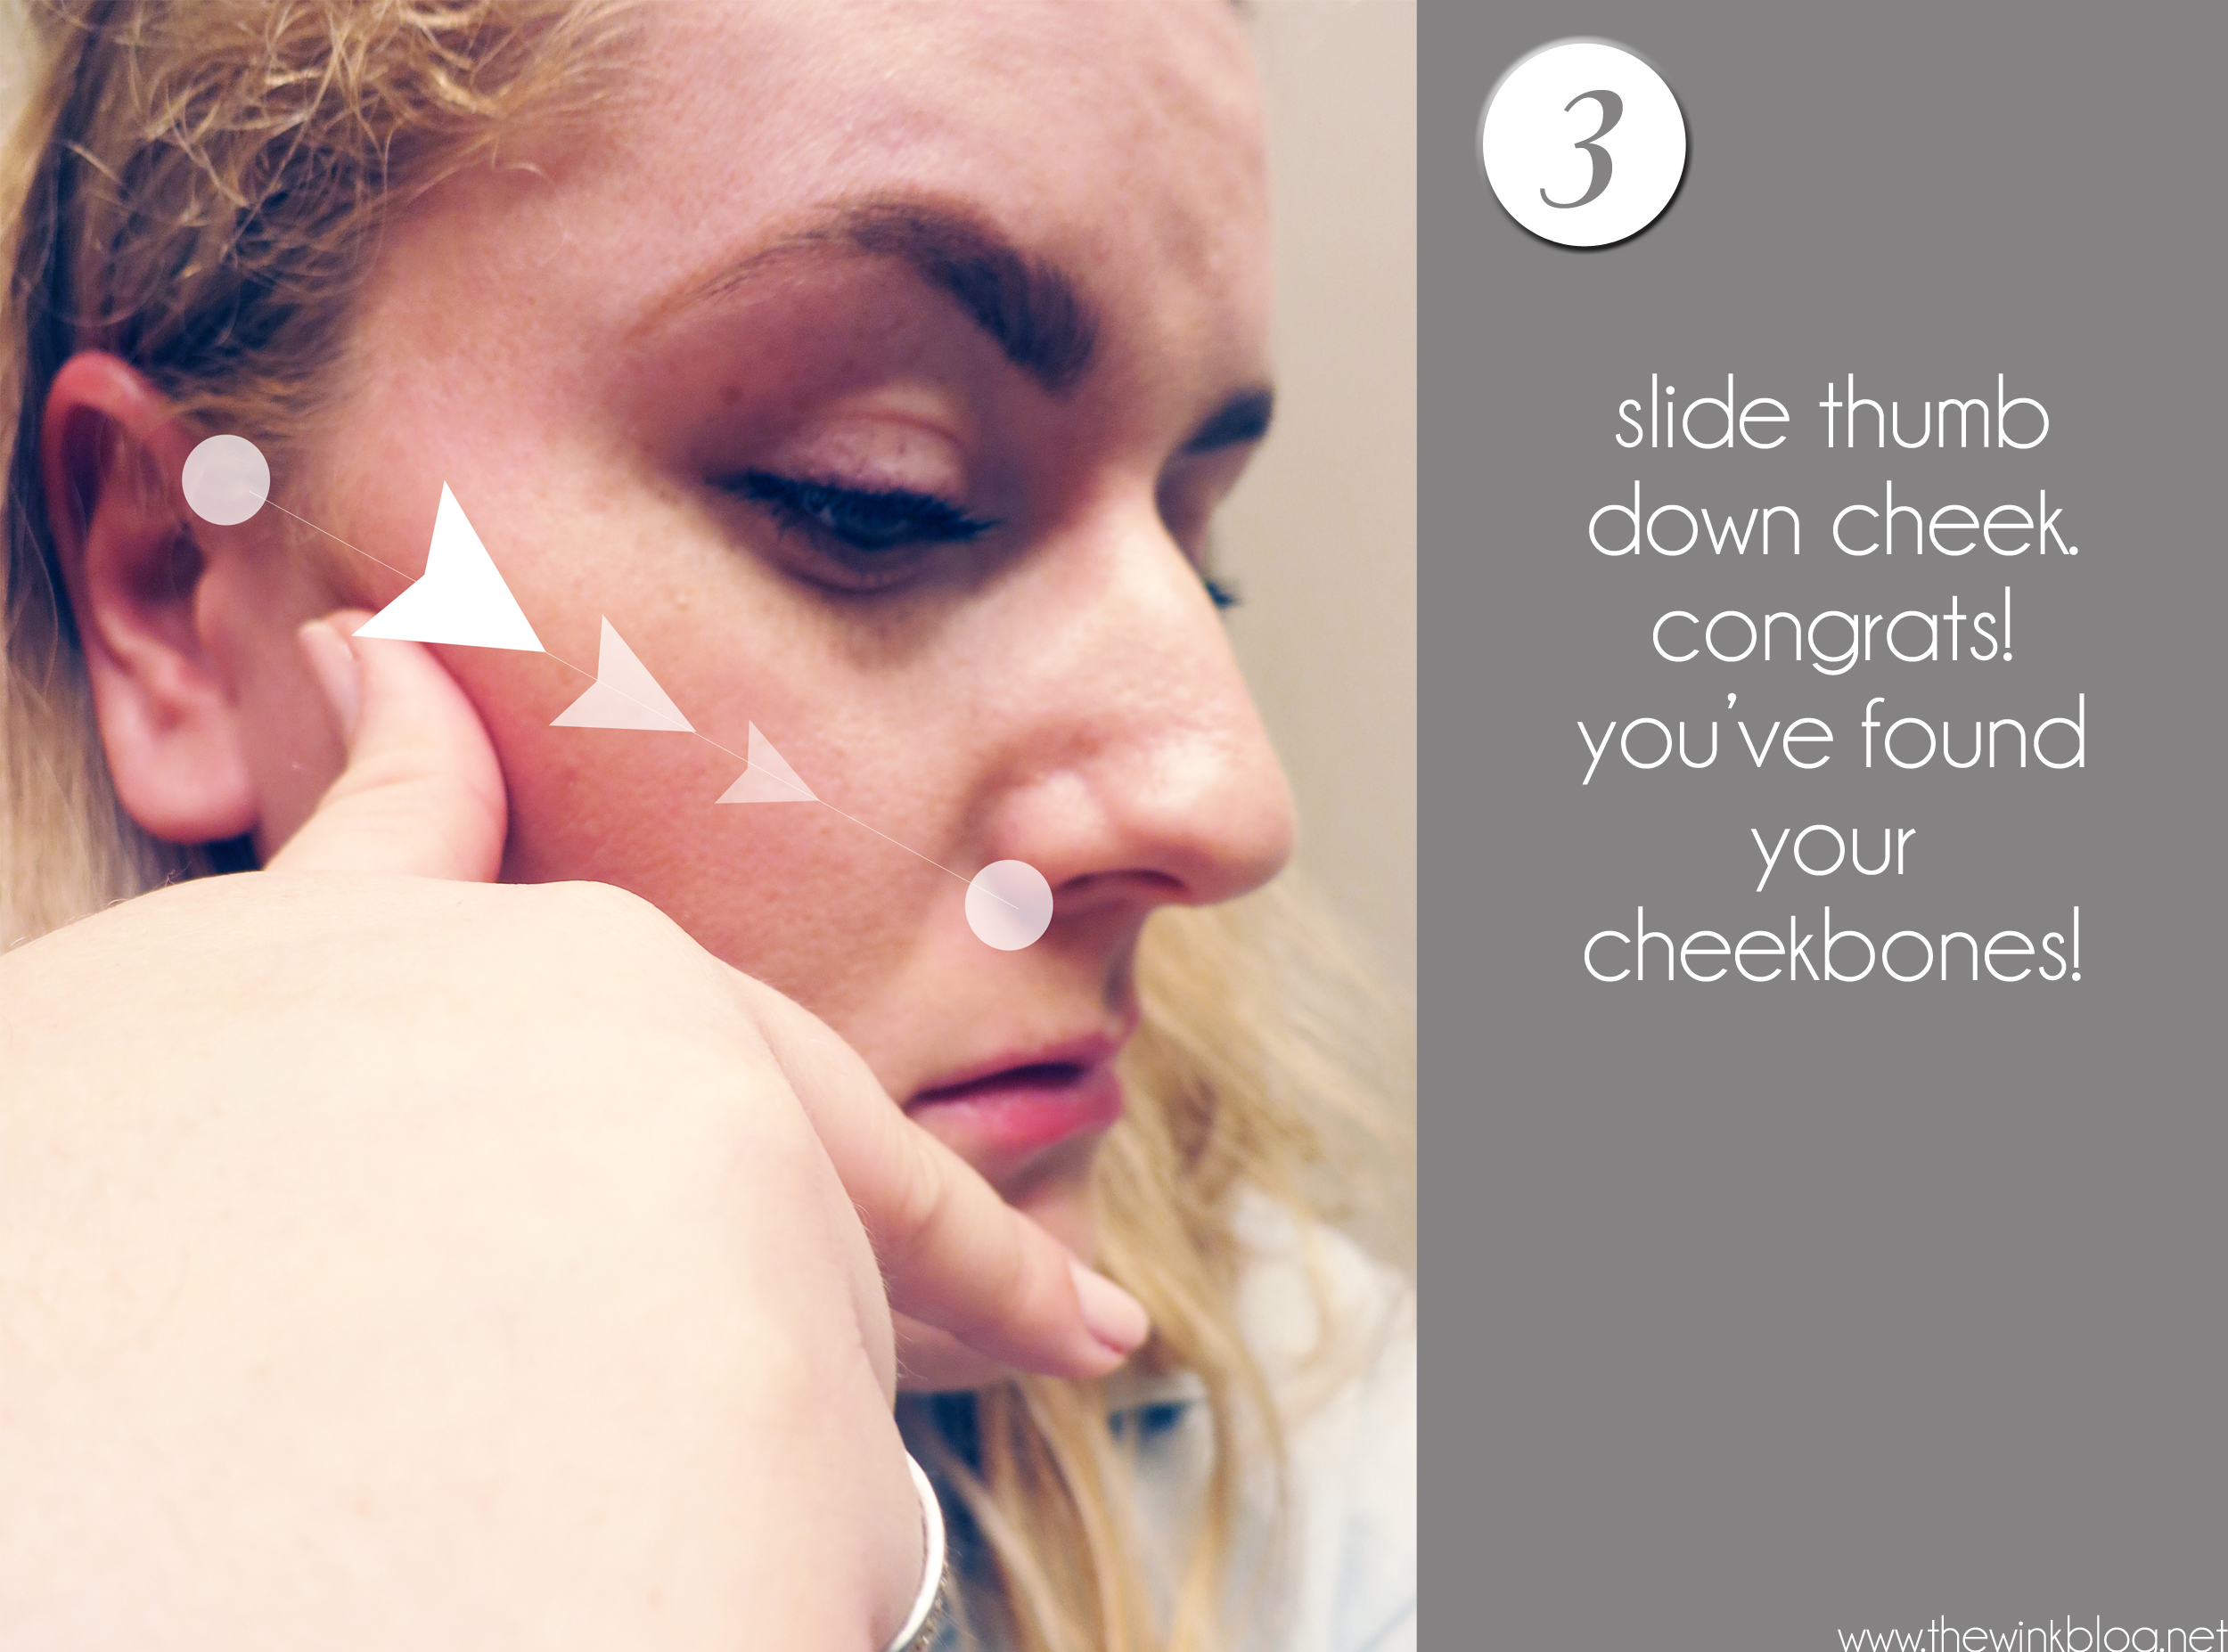
Finish by sliding your thumb down your cheek in the line that you formed with your hand. Congrats! You’ve found your ever-elusive cheekbone! I’ll have a highlighting and contouring tutorial coming up to show you how to properly showcase those beauties.
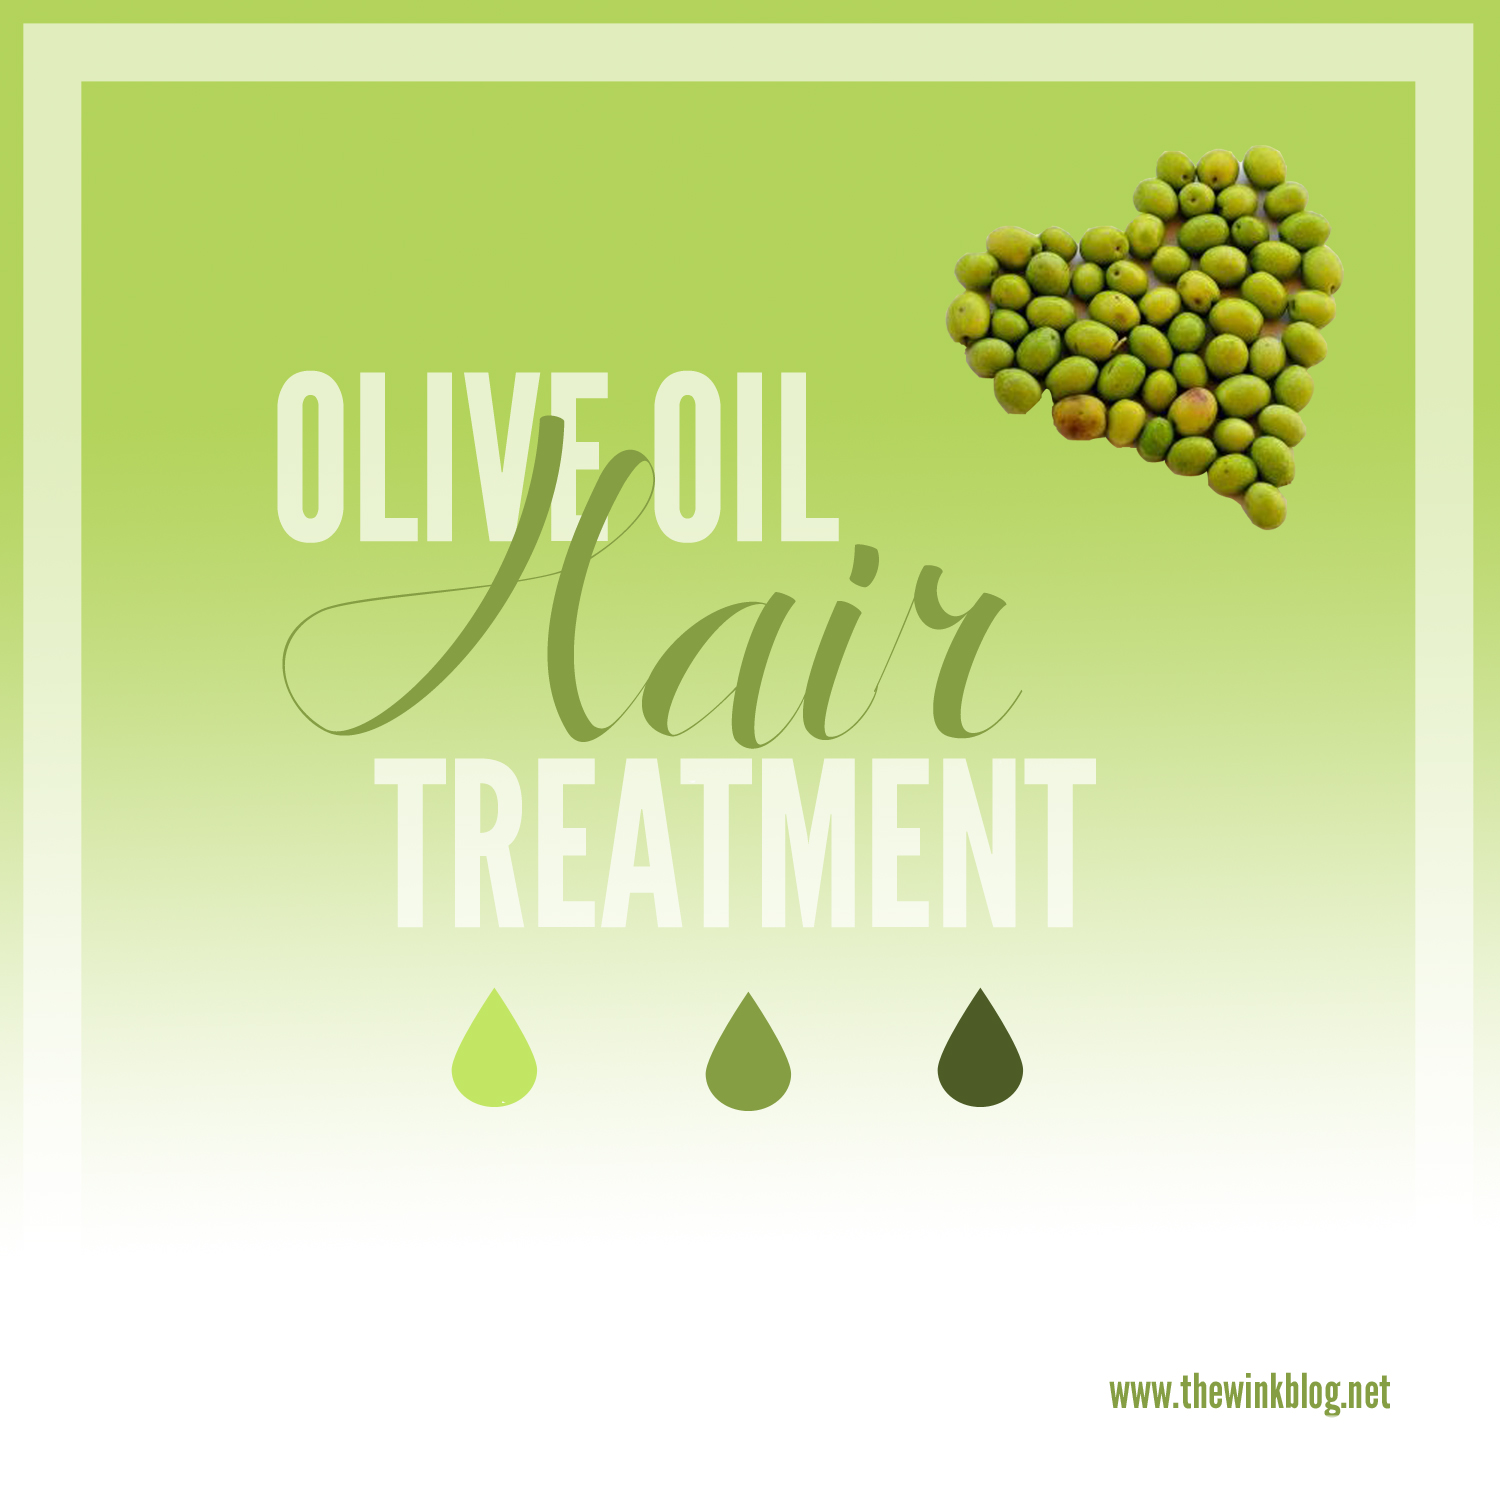
Once upon a time, there was a girl at my school with the most gorgeous, shiny, thick hair. I went up to her one day and asked, awestruck, how on earth she got her hair to look that beautiful. Her secret? The girl’s mom did hot oil treatments on her hair. After school that day I asked my mom if she would do hot oil treatments on my hair, too (she finally relented after a lot of begging). The outcome was seriously phenomenal hair… and I’ve been doing hot oil treatments ever since.
It may sound counterintuitive to add extra oil to your hair (especially if you have an oily scalp to begin with), but the oil will deeply hydrate, soften, and repair your split ends. Follow my easy steps for a seriously sexy mane!
Step One: Heat 1/4 cup olive oil (you may need more/less depending on hair length & thickness) in the microwave for 1 minute, or until oil is thin and warm. Be careful not to overheat the oil, otherwise you will end up a burn victim.
Step Two: Wear a towel around your shoulders and do this by a sink. You’re going to make a mess.
Step Three: Start by dunking the ends of your hair in the oil and using your hands to work it through the rest of your hair. By the time you use up the oil, your hair should be saturated from root to tip.
Step Four: Gently comb through hair with a wide tooth comb to distribute the oil. Clip your hair up and cover your head with a shower cap. The heat from the oil combined with the heat generated by your head will open the hair cuticle and allow for better oil absorption.
Step Five: Leave oil on your hair for 20-30 minutes. Jump in the shower and shampoo and condition normally.
Indulge in your olive oil hair treatment once a week for best results. It makes such a difference and people will be asking YOU how to get that gorgeous head o’ hair.
Your symptoms: flaky face, raw nose, chapped lips, and cracked hands. The culprit? You make be suffering from… winter. Even before the snow flies, winter weather is taking its toll. Amp up your usual skincare regimen and you’ll be glowing even when it’s snowing (I’m corny). Keep reading for my recommendations!
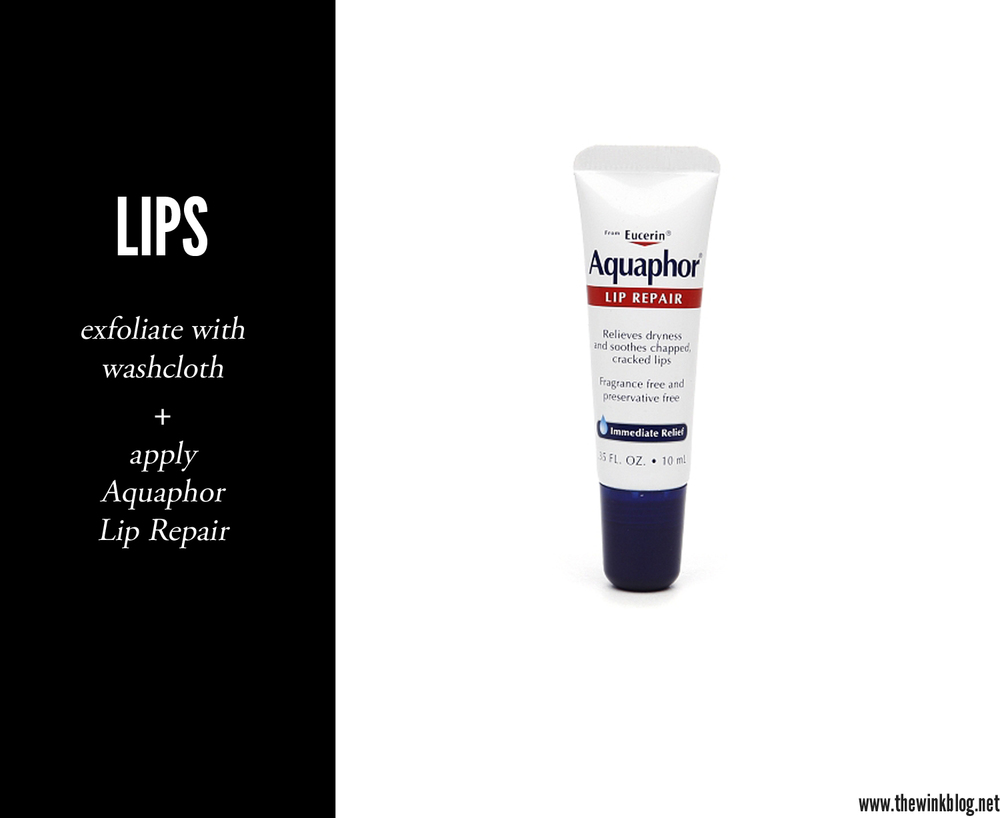
There’s nothing worse than dry, cracked lips! Every night before bed, exfoliate your lips with a damp washcloth. Then, apply an emollient lip balm like Aquaphor Lip Repair. It also works wonders on a raw nose!
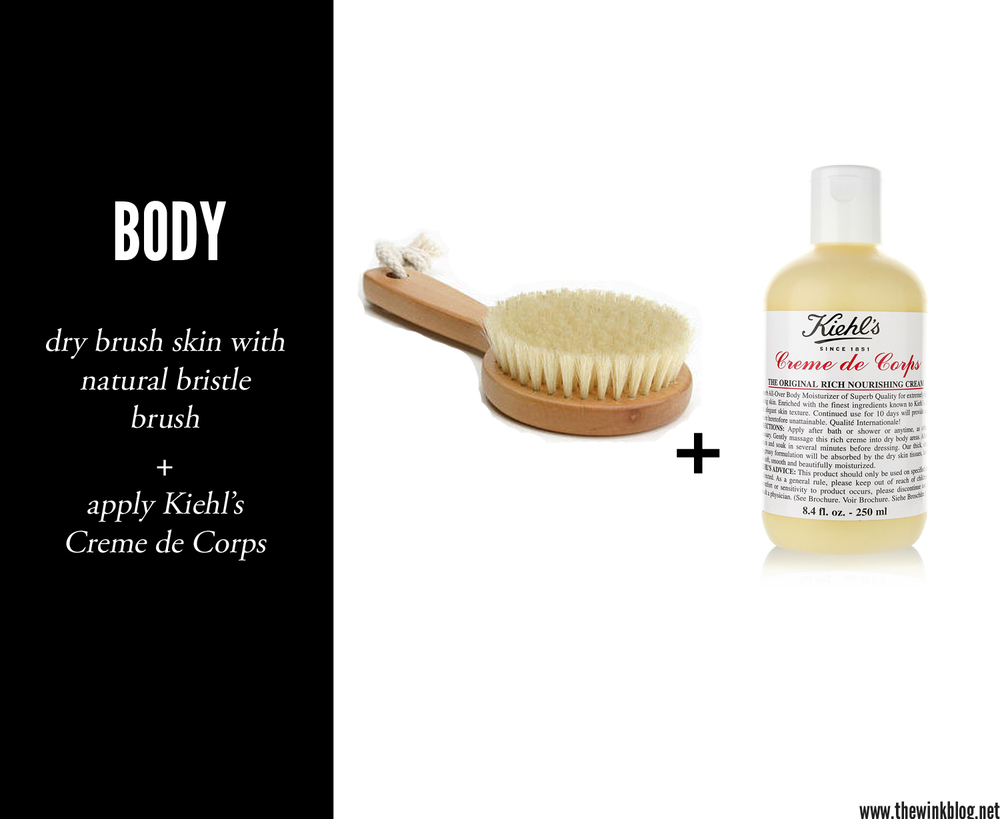
Before showering, dry brush your entire body with a natural bristle brush. Brush the skin on your arms and legs up towards your torso, and the skin on your back down towards the floor. This promotes circulation, rids your body of dead skin cells, and stimulates your lymphatic system. After showering, apply Kiehl’s Creme de Corps to damp skin.
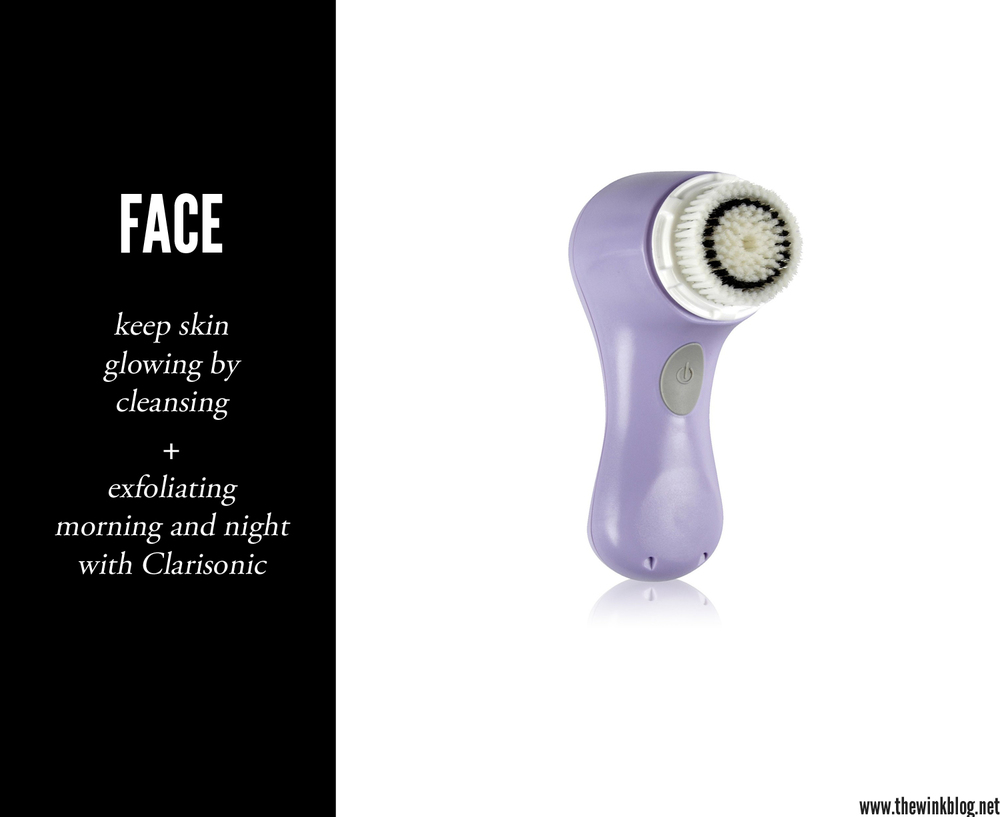
You gals know how much I love my Clarisonic! Use it to keep your face clean and smooth and to exfoliate dead skin cells.
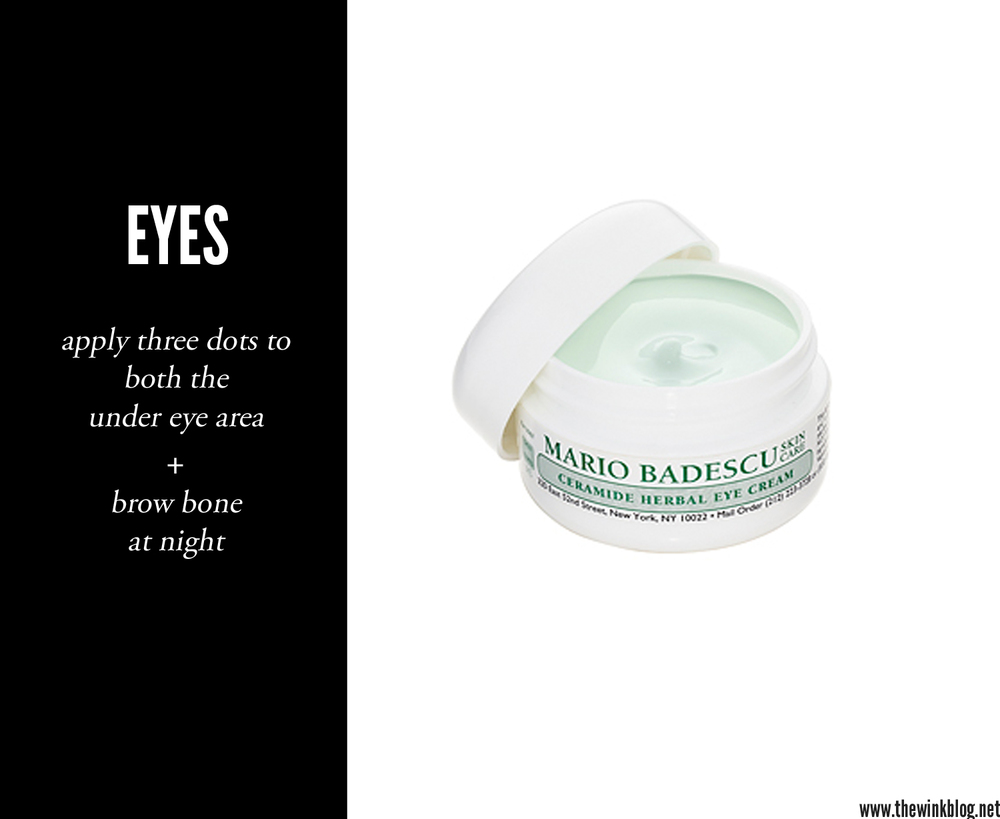
Winter weather calls for a heavy-duty eye cream like Mario Badescu Ceramide Herbal Eye Cream. The eye area does not have any of its own oil glands, therefore, the area needs to be supplemented with a rich eye cream so that it doesn’t dry out! Every night, apply three dots to each brow bone and under eye area and lightly tap to blend.
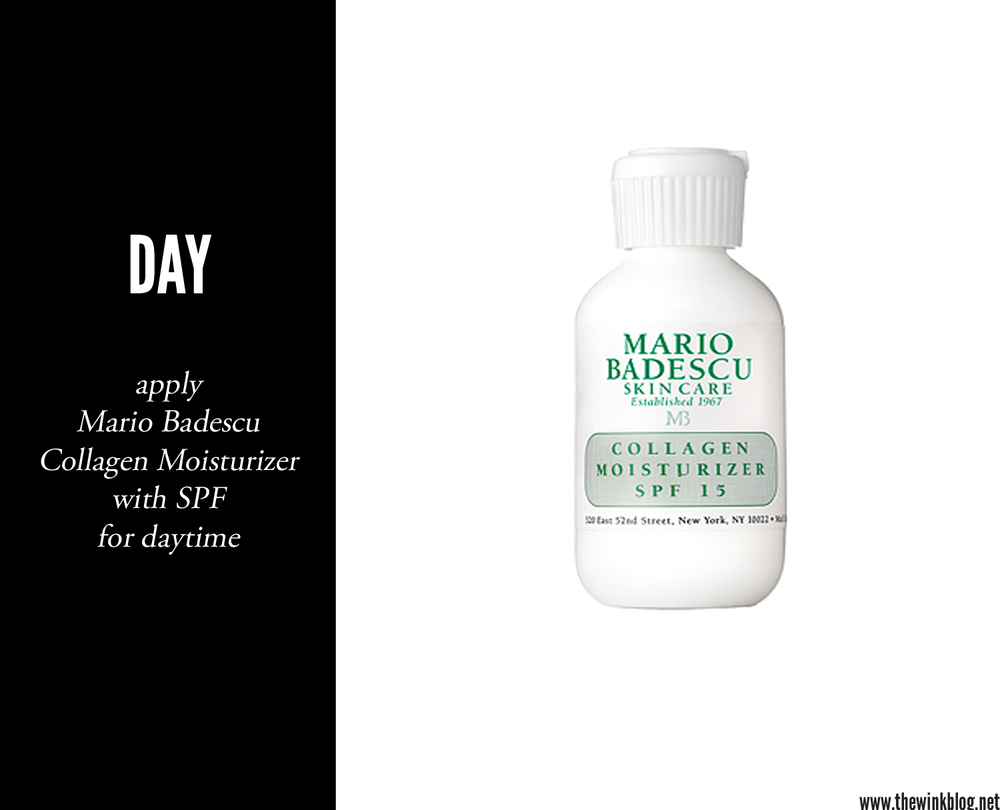
Even during the winter your skin still needs to be protected from the sun. Use a light, yet emollient moisturizer like Mario Badescu Collagen Moisturizer SPF 15 during the day. It protects the skin from moisture loss without the use of heavy oils.
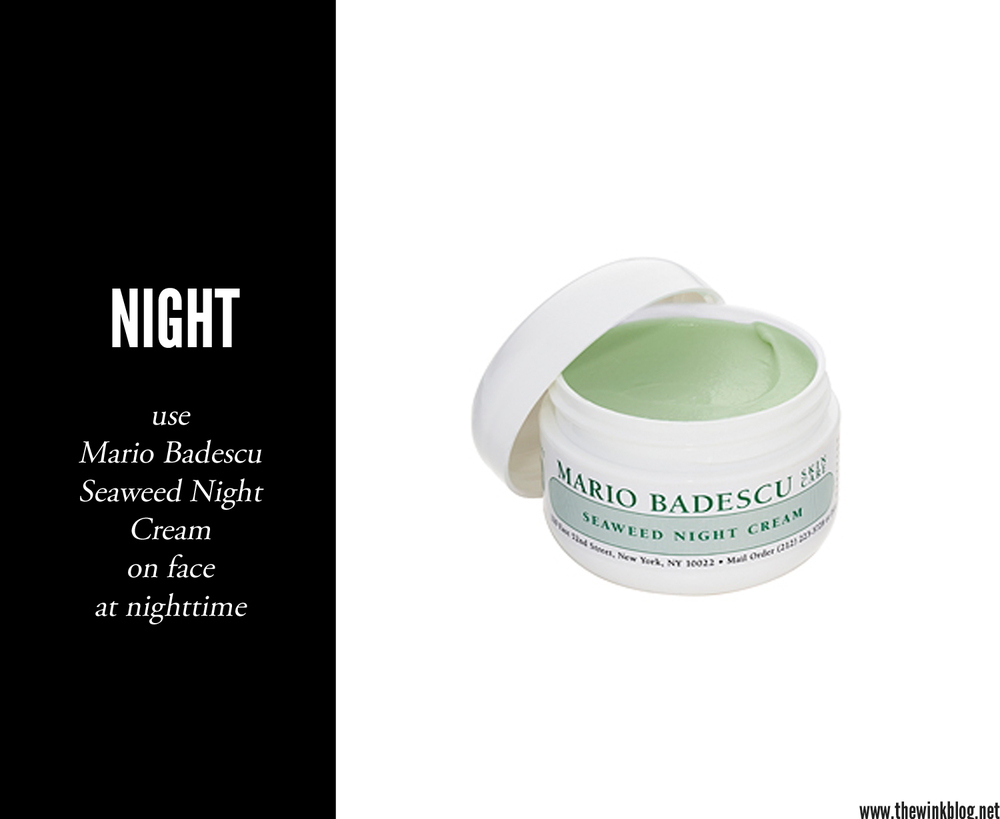
After washing your face at night, apply a thicker, richer moisturizer to your face. I like Mario Badescu Seaweed Night Cream because it leaves my skin soft and silky without clogging my pores.
What are some of your winter skin regimen recommendations?
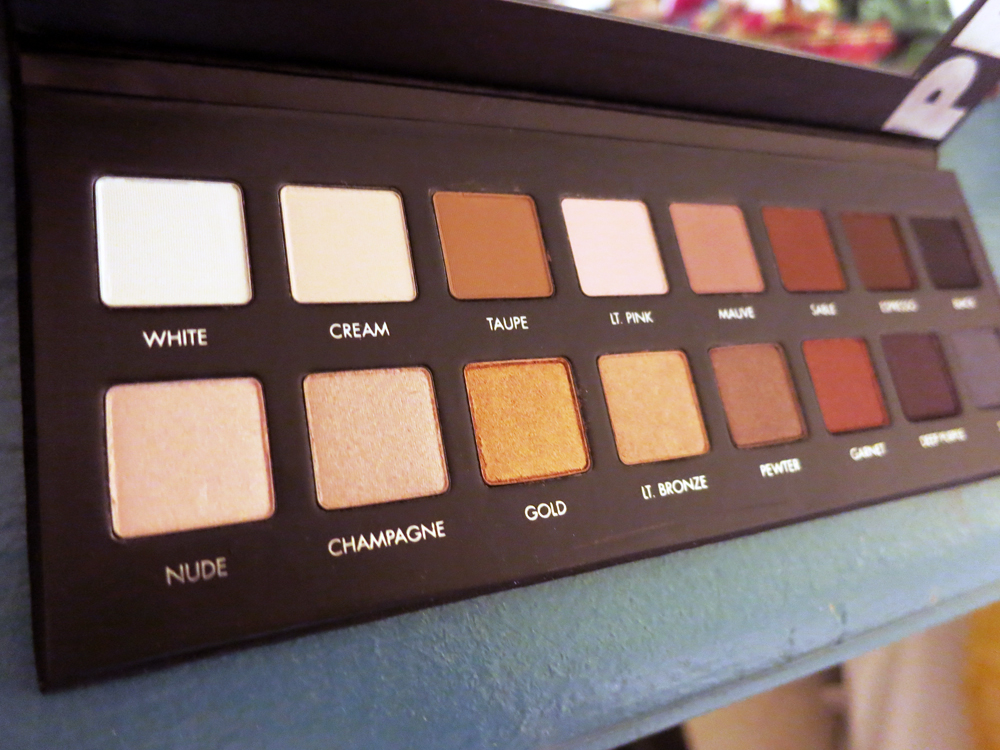
I’ll be the first to admit that I’ve never been very interested in eyeshadow. Since my usual makeup routine includes a bold lip, I tend to keep my eye makeup very basic with a couple coats of mascara and a tiny bit of eyeliner. However, with all the hype surrounding eyeshadow palettes lately (Urban Decay’s Naked palettes, specifically), I figured I’d give it a whirl and I picked up the Lorac Pro Palette. You guys, it’s safe to say: I’m obsessed.
The palette comes with 8 matte shades and 8 shimmer shades for a total of 16 shades. The colors are beautiful and highly pigmented; the texture of the shadow is soft and buttery. You can easily create soft, neutral looks for daytime or dark and dramatic looks for nighttime. The array of colors complement every skin tone. Trust me when I say that this is the only eyeshadow palette you’ll ever need.
I had held off on buying the UD Naked palettes because, honestly, the colors were too shimmery and strangely similar. With the Lorac Pro Palette you get more bang for your buck: the palette comes with 8 matte shades (versus 3 with Naked), 16 total colors (versus 12 with Naked), ringing in at $10 cheaper than any of UD’s Naked palettes.
Do you own the Lorac Pro Palette? Love it? Hate it? I’d love to hear your thoughts!
XO, J
P.S. I haven’t completely forgotten about my beloved lipstick… but I am enjoying mixing up my usual routine!
If your eyes are the windows to your soul, then your eyebrows are the curtains. Perfectly polished and groomed eyebrows have the power to complete your face. That being said, many women have trouble achieving eyebrow perfection. My secret to perfect eyebrows? The Benefit Brow Bar. I recommend the Benefit Brow Bar to all my friends – those Benebabes are professionally trained to give women the most fantastic eyebrows of their life!
Last Saturday, my friend Meghan and I took a trip to the Benefit Brow Bar (located at Ulta) to have our brows waxed and shaped. I’ve been going to the Benefit Brow Bar for years (hi, Cait!) and rave about it constantly to all my friends. Meghan has been working on growing out her eyebrows because she is tired of regular salons waxing them too thinly.
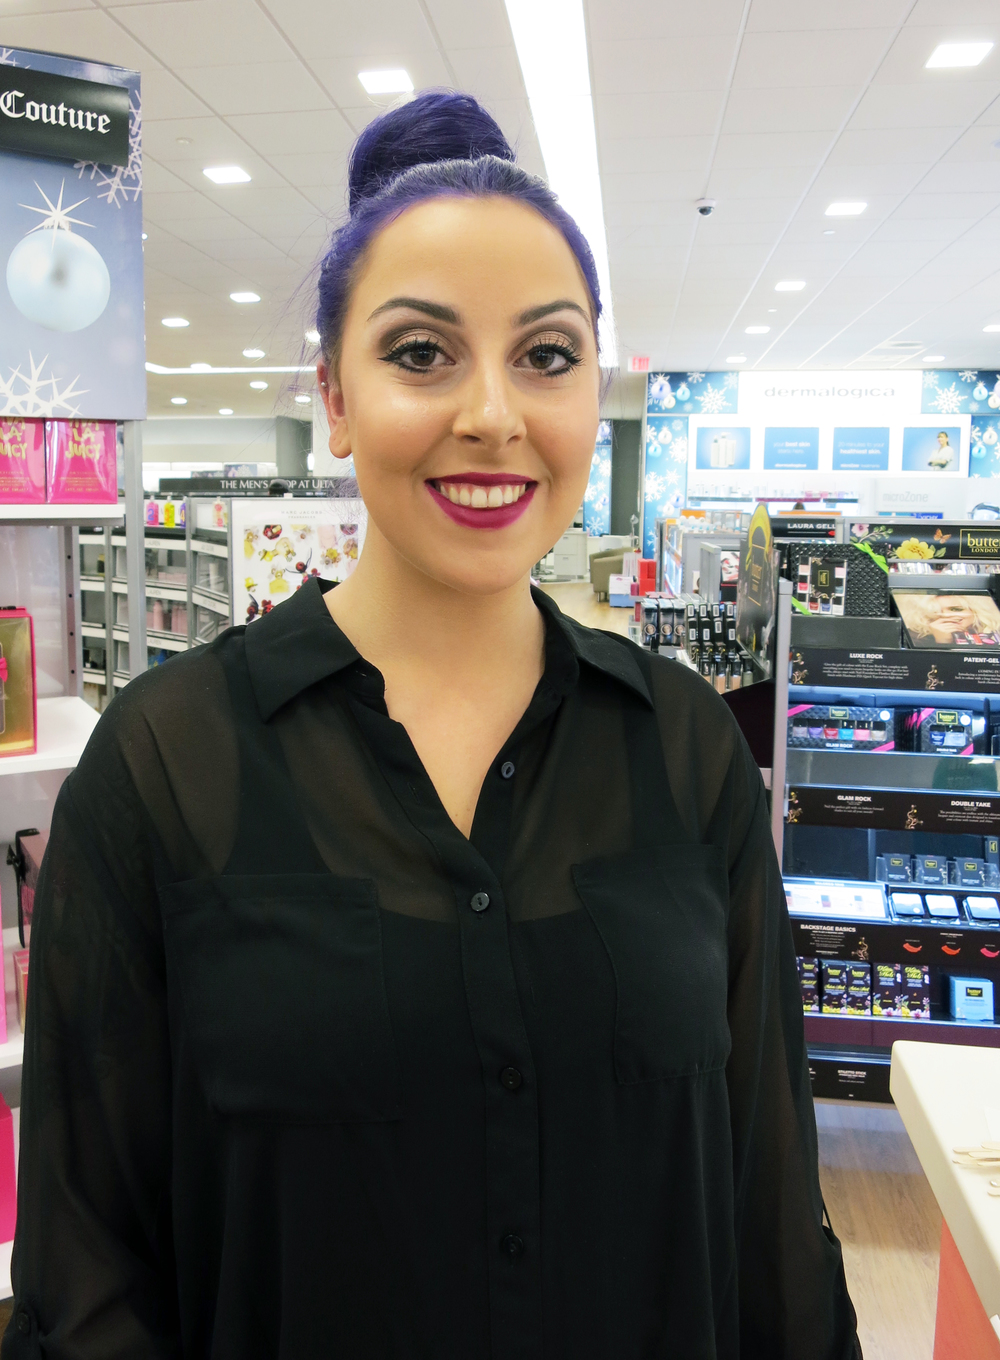
The fabulous Emily was our arch expert. How awesome is her dark purple hair?!
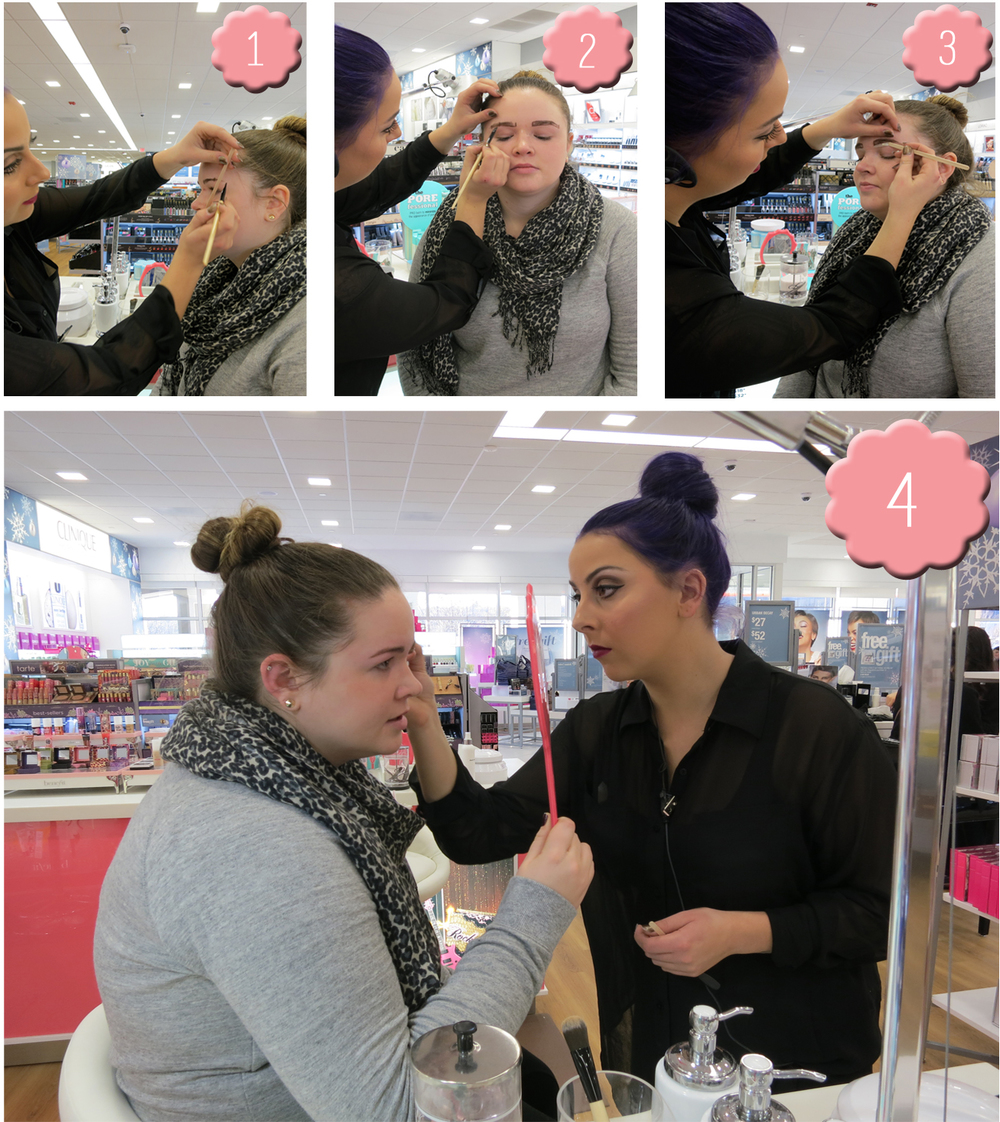
Emily started out by mapping Meghan’s brows. She used a straight edge to determine where her brows should begin, arch, and end.
Brow mapping looks a little scary, but those arch experts are professionals! They always do this so they know exactly where to wax.
Emily then applied the wax to Meghan’s brows and waxed only the places outside the lines of the brow map.
After Emily was finished waxing, she applied Gimme Brow to Meghan’s brows to add volume and to hold them in place. Under the brow she applied High Brow to emphasize and highlight the arch.
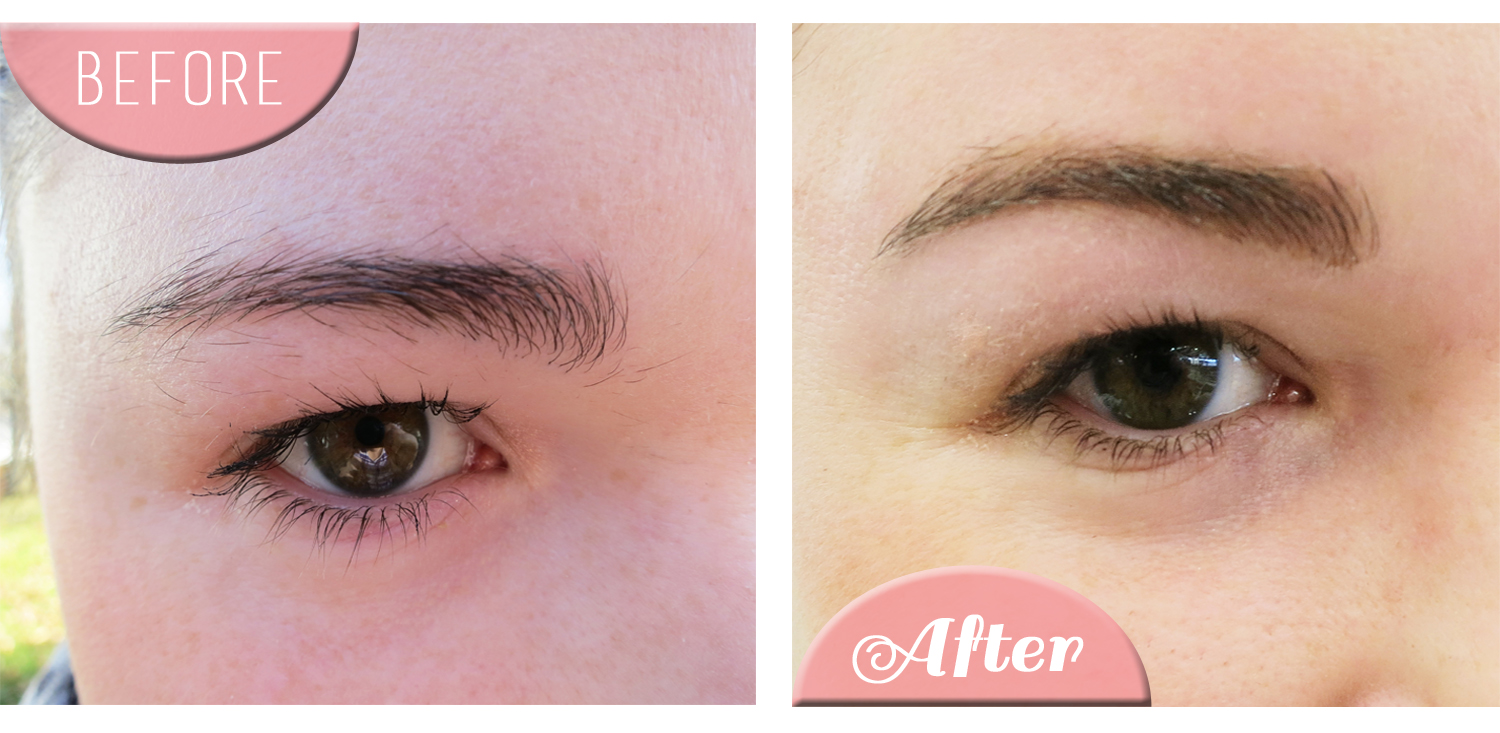
What a difference! Emily gave Meghan’s brows shape and structure while maintaining volume.
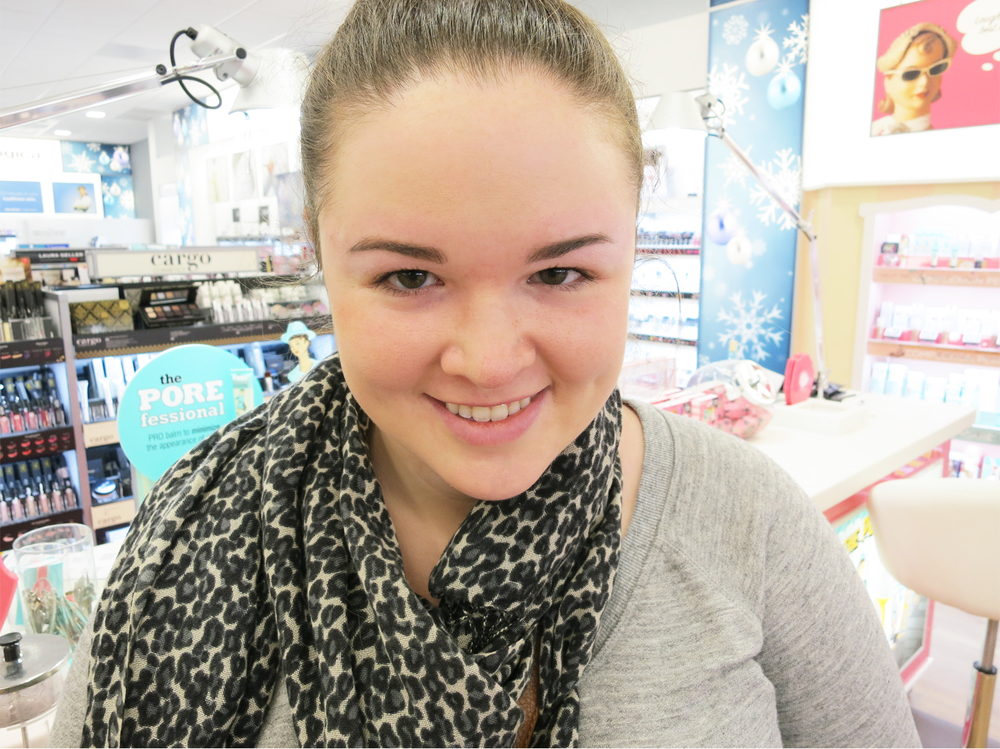
Such a beaut. Gals, go make an appointment at your local Benefit Brow Bar now! Those Benebabes are brow rockstars and will make you look like one too.
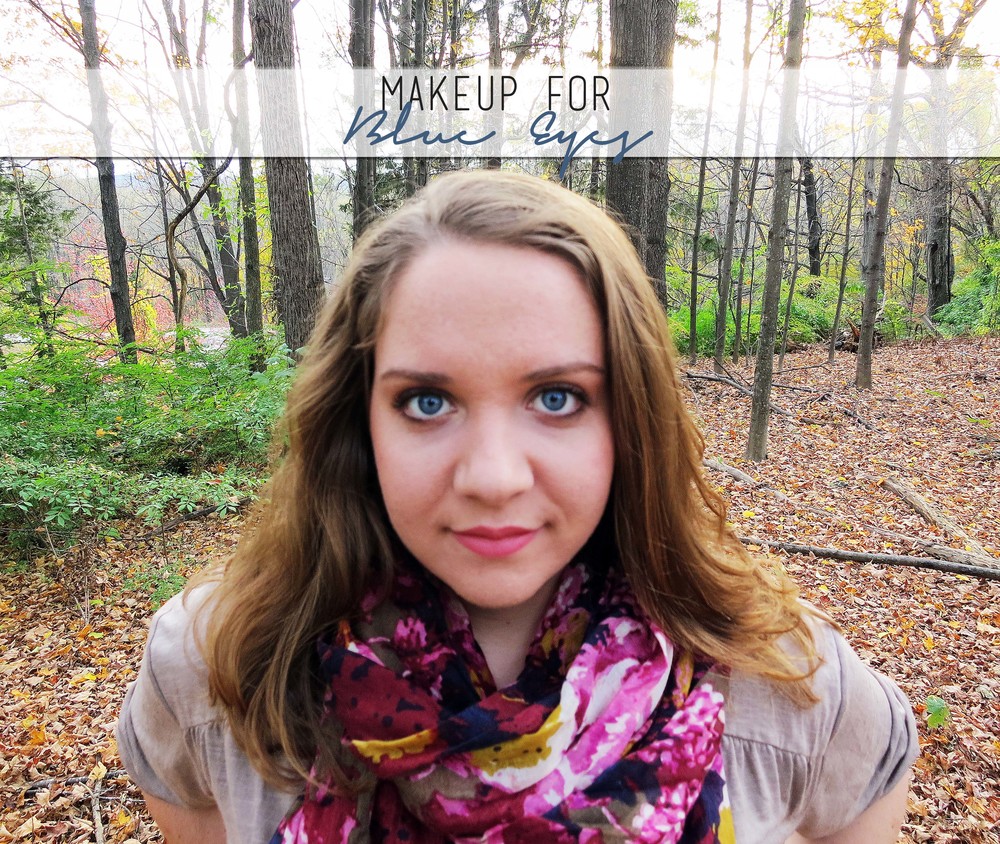
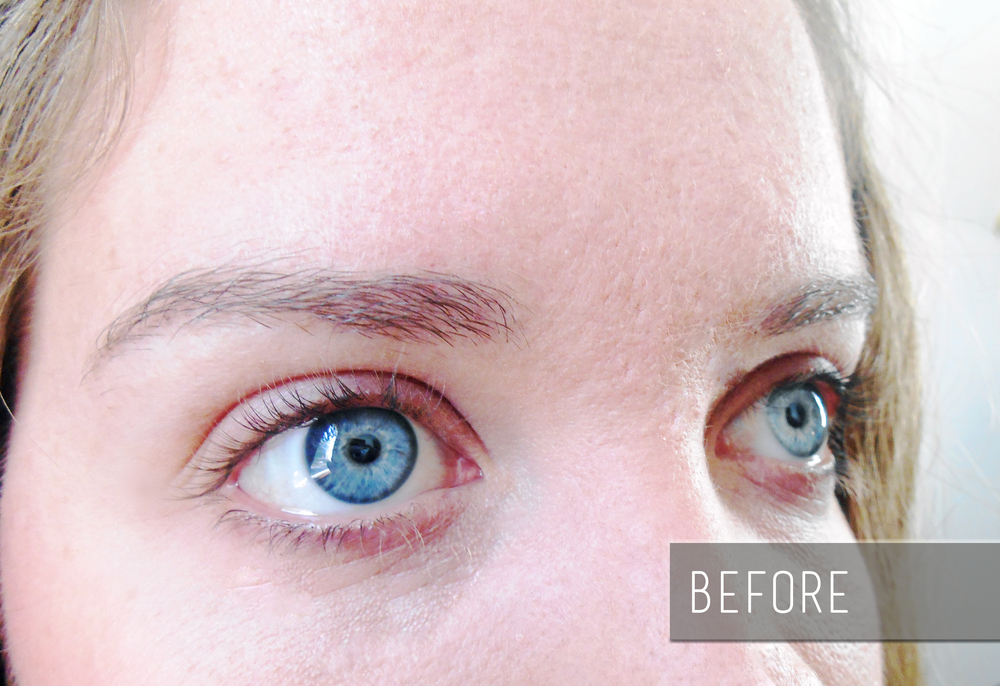
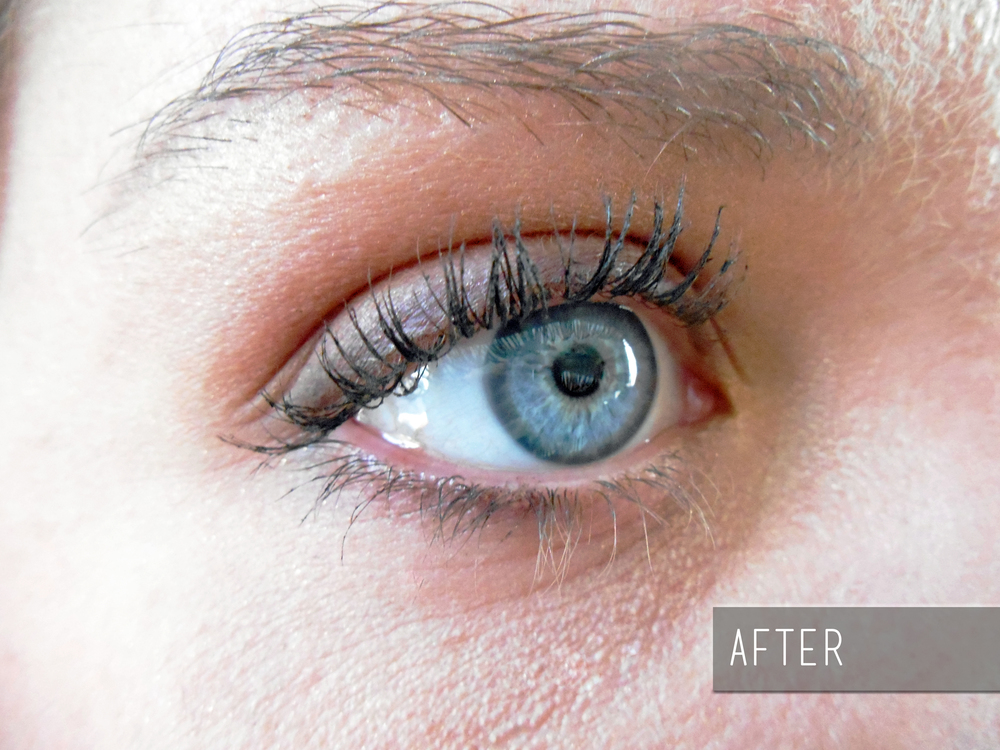
Welcome to my very first makeup tutorial! Meet my friend Catherine. Catherine is a fifth grade teacher and was looking for a natural-yet-pulled-together everyday makeup look that she could wear to school. This tutorial is a for soft and neutral makeup look that emphasizes those gorgeous baby blues. Let’s get started!
As you can see from the photo above, Catherine has a standard eye, meaning you can see the entire eyelid when the eye is open. Her eyes are round and protruding (the opposite of deep-set). She also has light eyelashes and eyebrows so I kept her look neutral and soft.
Step Two: Apply a matte cream colored shadow to the entire lid, from the inner corner all the way up to the brow bone. I used Lancome shadow in Coquille, which is discontinued, so try Lorac shadow in Cream.
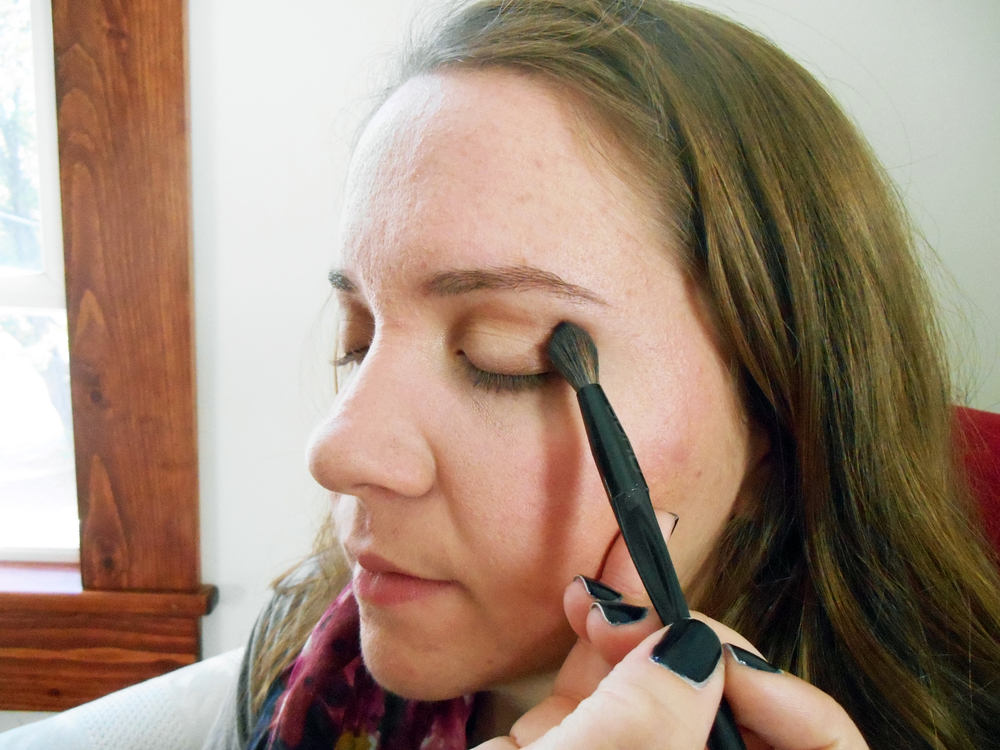
Step Three: Using a dense, flat eyeshadow brush, place a red-toned brown shadow in the crease. I used Lancome shadow in Rustique (discontinued) so try Lorac shadow in Sable. Then, pick up some more of the brown shadow with a crease brush and blend thoroughly into the crease using a windshield wiper motion. Only place the shadow in the crease! If you bring it down on the lid it will look too dark and dramatic for daytime.
Step Four: Apply a shimmery champagne-colored shadow in the inner corners of the eyes. I used Lancome shadow in Honeymoon.
Step Five: Using a dark brown eyeliner, line the upper lid as close to the lashline as possible. Use your ring finger to smudge the line ever-so-slightly. I used L’Oreal Voluminous Smouldering eyeliner in Brown for Catherine.
Step Six: Apply the brown eyeliner outer third of the bottom lashline as well. Use your ring finger to smudge and soften.
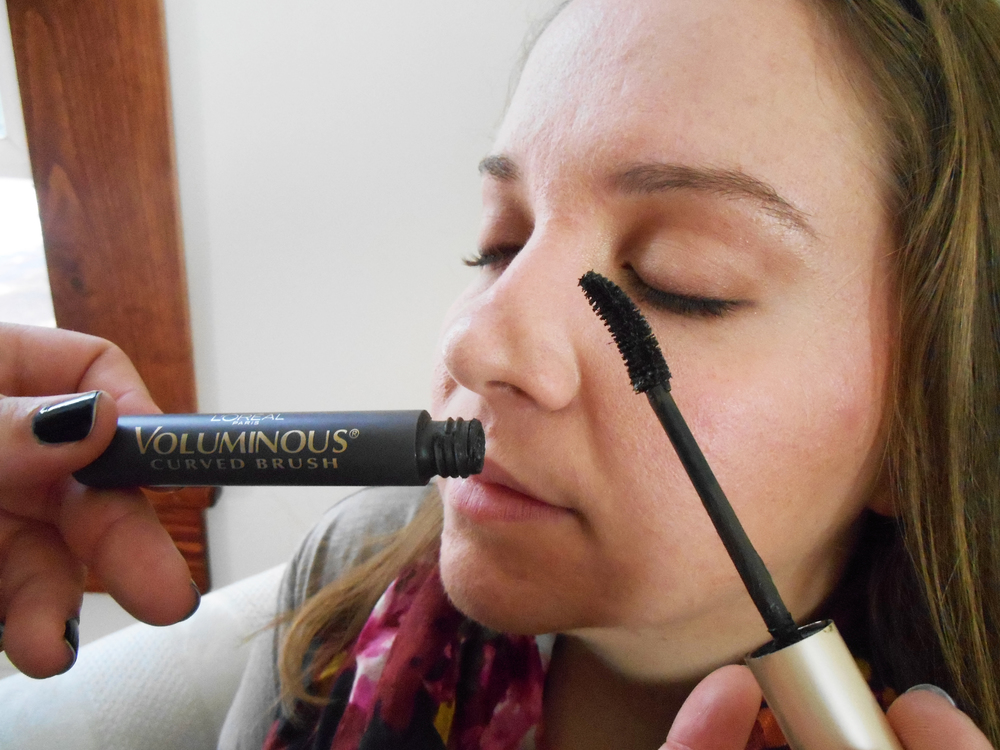
Step Seven: Curl one set of lashes. Apply a volumizing mascara (like L’Oreal Voluminous mascara in Black/Brown) to upper lashes only. Repeat on the other eye.
Voila! Here is the finished product. It is a natural, everyday look that’s perfect for the classroom!