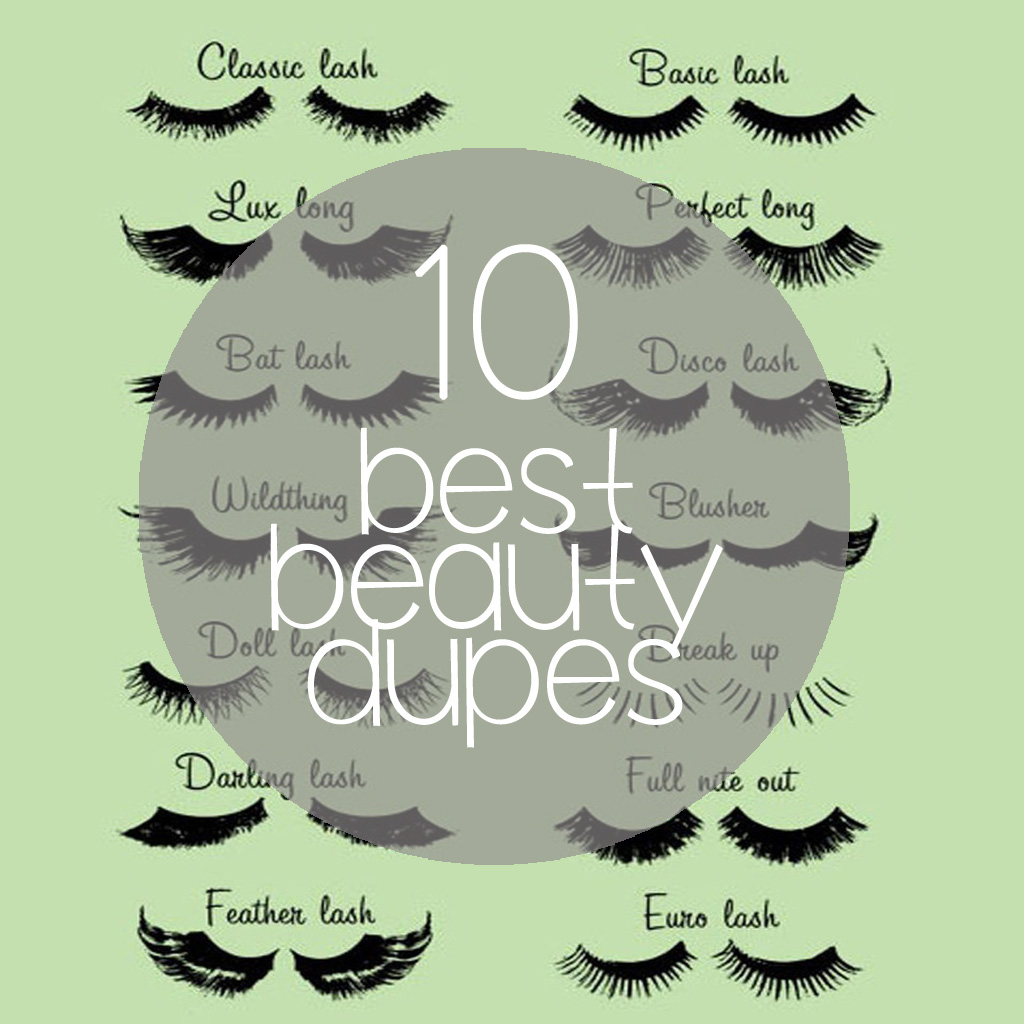
Hey, I love cosmetics as much as the next girl. But it pains me a little to pay tons of money on something that ends up getting washed down the drain at the end of the day. That is why I’ve put together a list of the 10 best beauty dupes for high-end cosmetics. Because we all work hard for our money, so why waste any of it on a product you can get cheaper? You’ll be saving money while looking fabulous!
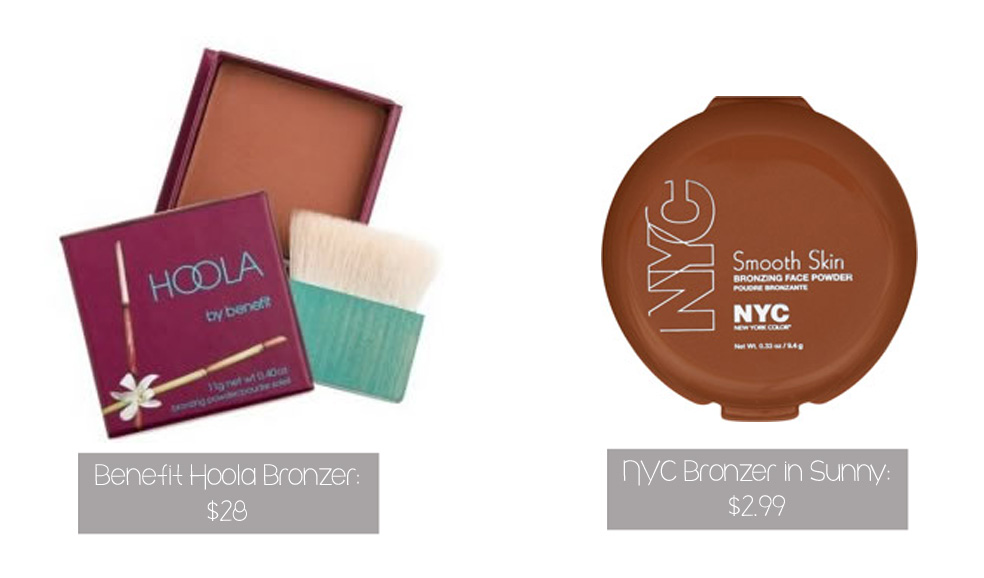
NYC Sunny is a 100% matte bronzer that is perfect for contouring. You can’t really beat the $2.99 price tag, either. A near exact dupe of Benefit Hoola. Click to buy!
NARS ‘Orgasm’ is the best-selling, most award-winning blush in the cosmetic world. However, Milani has managed to create a phenomenal dupe with their ‘Luminoso’ blush. In my experience, I’ve only ever been able to find this blush at CVS. Be warned: it is extremely popular and has been known to fly off the shelves! Click to buy!
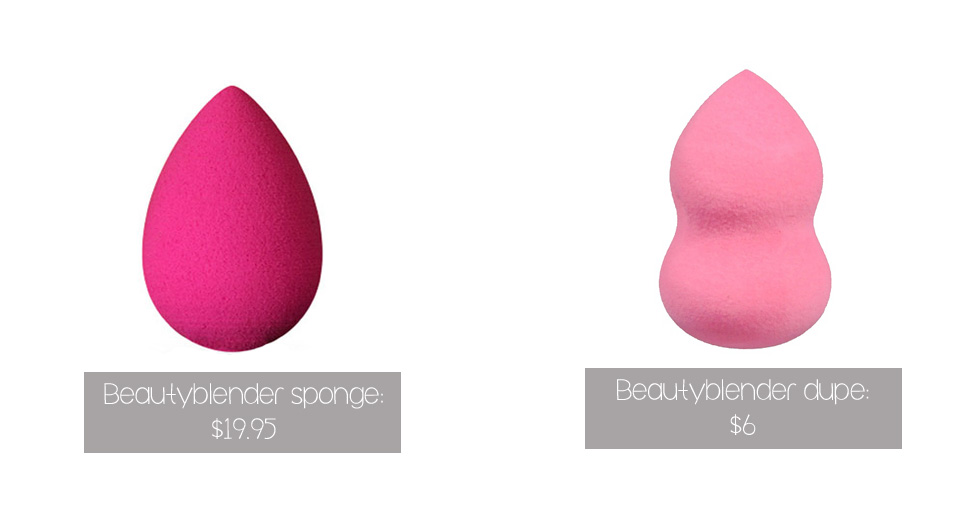
As I wrote about before, I believe that the Beautyblender dupes out there work as well as the original Beautyblender. After all, nobody wants to spend $19.95 on a sponge if they can get one for $6! Click to buy!
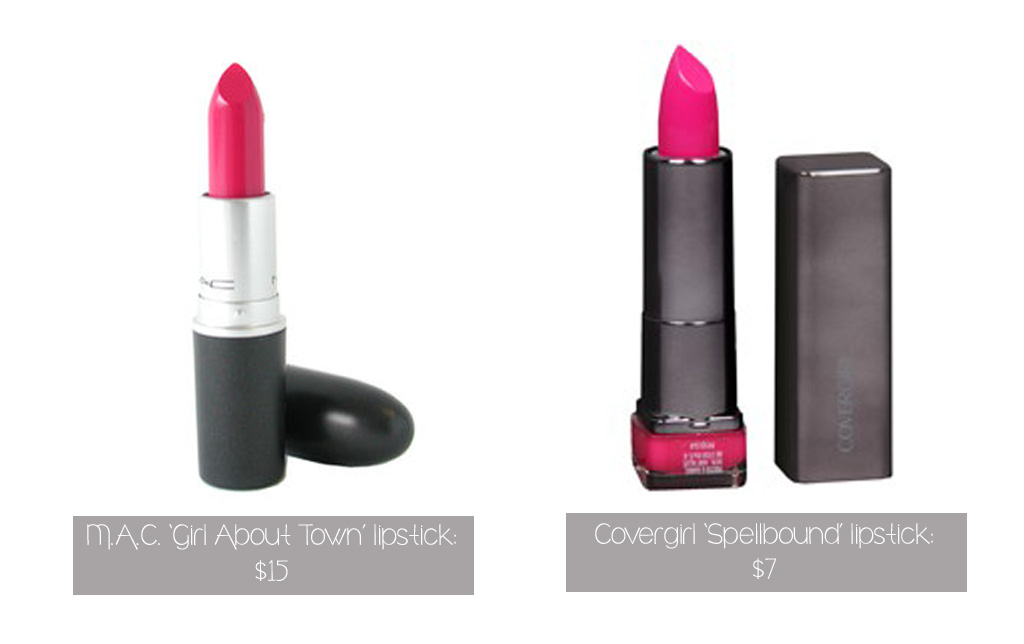
A creamy, fuchsia pink! If you’re looking to dip a toe into the world of bright lipstick, ‘Spellbound’ will only set your back $7 as opposed to $15 ‘Girl About Town.’ Click to buy!
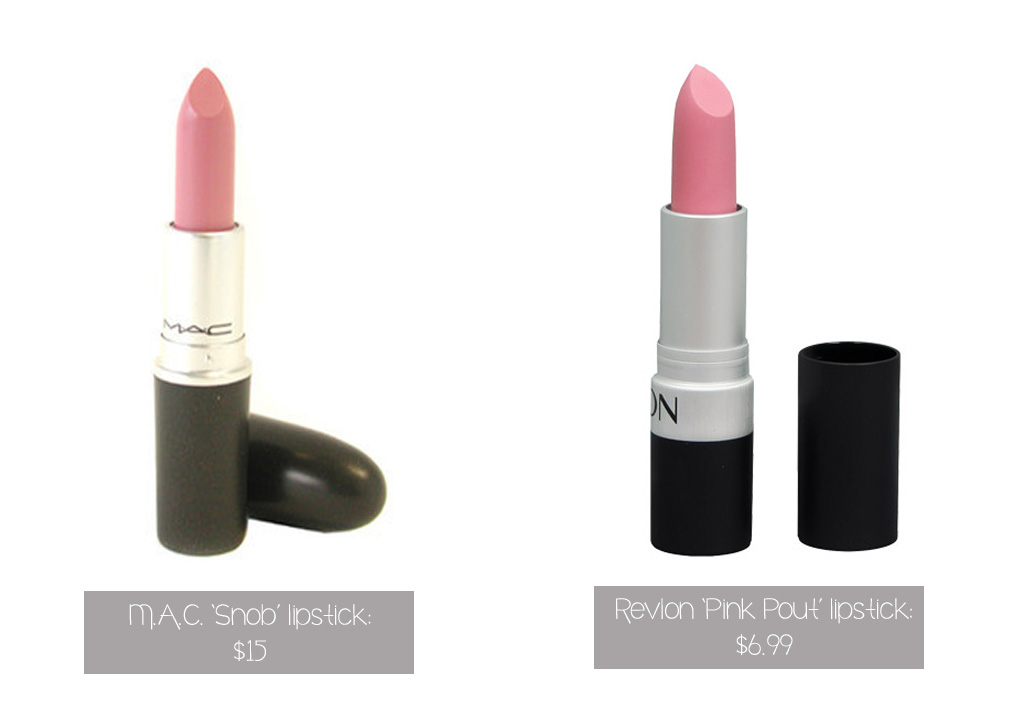
Revlon ‘Pink Pout’ is an almost identical dupe to M.A.C. ‘Snob.’ The color is matte, nude/baby pink with a hint of mauve. And Revlon’s is less than half the price of M.A.C.’s! Click to buy!
Umm… $19 for an eyeliner pencil? No, thanks. Heavy eyeliner users could probably rip through a pencil every month. But $5.99 for the same creamy formula, color payoff, and staying power as Urban Decay’s 24/7 eyeliner? Much better. Click to buy!
In my opinion, L’Oréal Voluminous mascara is the best drugstore mascara out there. This is due to the phenomenal formula and brush (remember my post about mascara?). It also bears an uncanny resemblance to Diorshow, but at $7.99, it’s a lot easier on our bank accounts. Click to buy!
YSL Touche Éclat is the crème de la crème of highlighting concealers. However, I’m obsessedwith Maybelline’s lower-priced dupe. Its gel-like formula mimics Touche Éclat to a T. Click to buy!
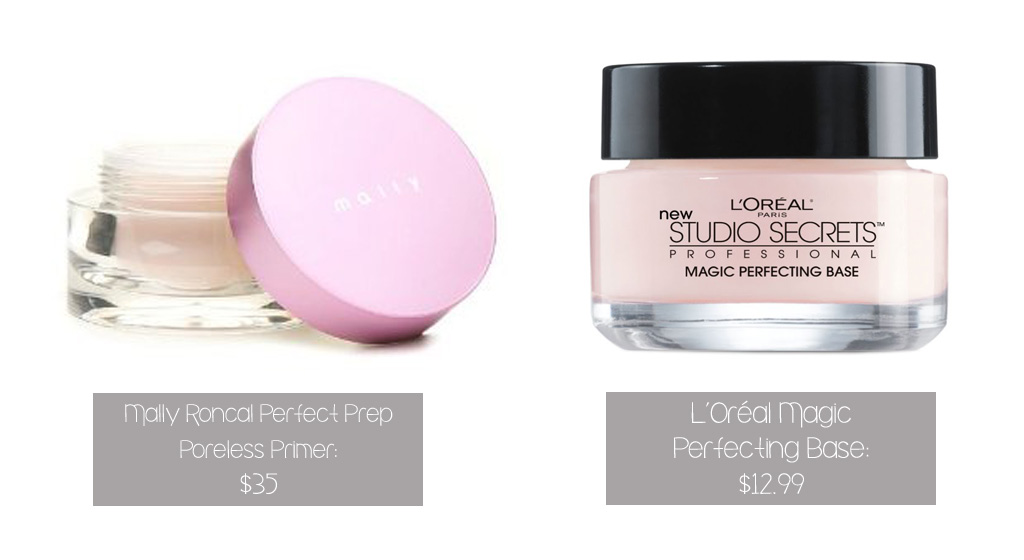
Want perfect, poreless skin? Snag a jar of L’Oréal’s perfecting primer which costs a mere fraction of what Mally Roncal’s does. Click to buy!
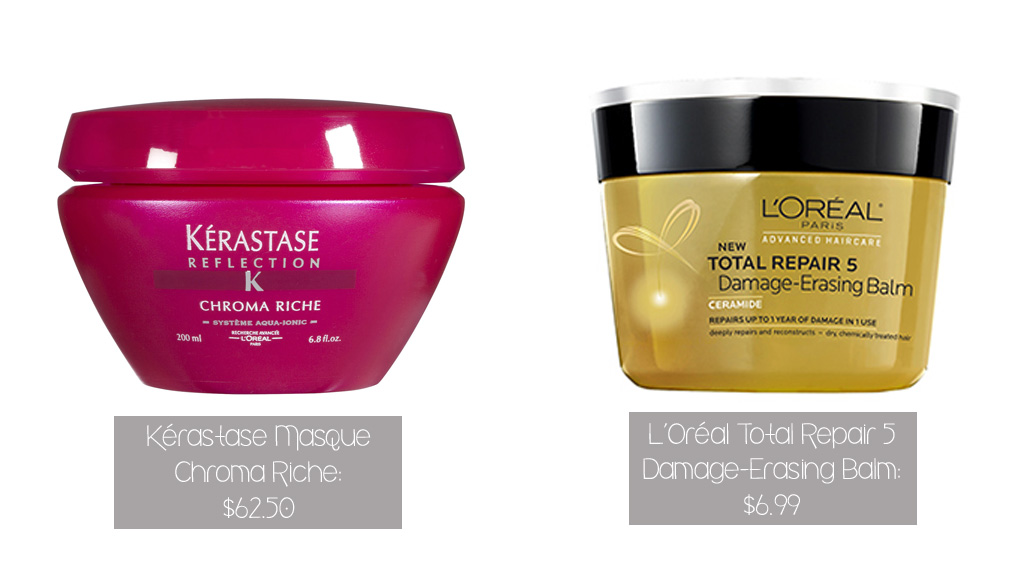
Wanna know a secret? Kérastase, a high-end hair product line, is owned by none other than L’Oréal Paris. Which means that this L’Oréal hair mask is an almost identical dupe to Kérastase Masque Chroma Riche. A jar of this hair magic will only set you back $6.99 instead of a whopping $62.50! Click to buy!
For more best beauty dupes & style dupes, check out these posts:
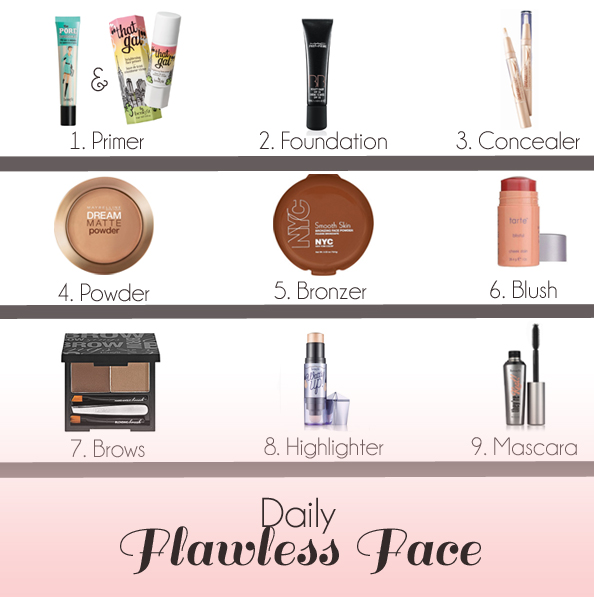
A lot of women tend to get into makeup ruts (myself included). I also have the tendency to keep using a product even though it may no longer work for me. However, over the years I’ve been able to perfect my daily makeup routine into 9 easy steps with my tried-and-true favorite products that I use every. single. day. Keep reading to find out what my favorite everyday makeup is and how to look truly gorgeous on the daily!
1. Start by priming your face. On the back of your hand, mix together a tiny squirt of Benefit the POREfessional and Benefit “That Gal” to create a balm. Spread all over your face with a paddle foundation brush, focusing on your t-zone.
2. Apply M.A.C. BB Cream foundation. Squirt a small amount onto the back of your hand. Use a dampened beauty blender sponge (that has been squeezed under running water 10 times) to blend foundation into skin using a buffing motion. Apply a second layer and blend as needed.
3. Dot Maybelline Dream Lumi Touch highlighting concealer under eyes and on the inner corners of eyes. Gently blend with your ring finger.
4. Using a large, fluffy powder brush, dust Maybelline Dream Matte pressed powder onto t-zone. Dust over closed eyes to set the concealer and to add a thickening layer to your eyelashes.
5. Using the same fluffy powder brush, swirl into NYC Smooth Skin bronzer (in Sunny). Tap and dust off excess product on the back of your hand. It is very important to always start off with a small amount of bronzer and slowly build the color onto your face. Starting below your cheekbone near your ear, gently dust the bronzer onto your face, moving in tiny up-and-down movements while slowly working your way in towards your mouth. Repeat this process again below the other cheekbone, making sure to dust off excess bronzer before ever touching your face with the brush. Dust a tiny bit of bronzer on your temples, hairline, jawline, and down the bridge of your nose.
Pro tip: always use a matte bronzer with no trace of shimmer or sparkle to avoid looking clownish.
6. Apply Tarte Cheek Stain to cheekbones and blend up towards your temples and out towards your hairline with your fingers. This blush has a gel-like consistency and gives a very natural-looking flush.
7. Fill in your brows using an angle brush with Benefit Brow Zings. Start 1/4-1/2″ away from the start of your brows to avoid a heavy-handed look. Fill them in using light, feathery strokes and working your way through to the tail. Accentuate your arches because they’re the money-makers of your eyebrows! After you’ve filled them in, run a clean spoolie brush through them to add softness, fullness, and to make them look more natural.
Pro tip: filling in your brows is the one step that makes your look completely polished and the one thing I’d never leave the house without doing!
8. Apply Benefit Watt’s Up! highlighter to your browbones, cheekbones, inner corners of your eyes, down the bridge of your nose, and your cupid’s bow. Be sure to softly blend it to create glowing, radiant skin. Also, apply the Maybelline concealer from step 3 underneath the length of your brows and above the upper outer half (past your arch). Blend gently with your ring finger but do not wipe off.
9. Curl one set of eyelashes. Apply Benefit They’re Real! mascara to upper lashes only. Hold the brush horizontally and, starting at the base of your lashes, wiggle in a zig-zag motion up through the tips. Then, flip the brush vertically and use the spiky tip to comb through any clumps, focusing on getting into the outer corners to coat every lash. Repeat on the other eye.
With your newly flawless face, the possibilities are endless! Feel free to swipe on some bright lipstick, a fun eyeshadow, or bold eyeliner (just not all at the same time, please!). Now put your best face forward, gorgeous!
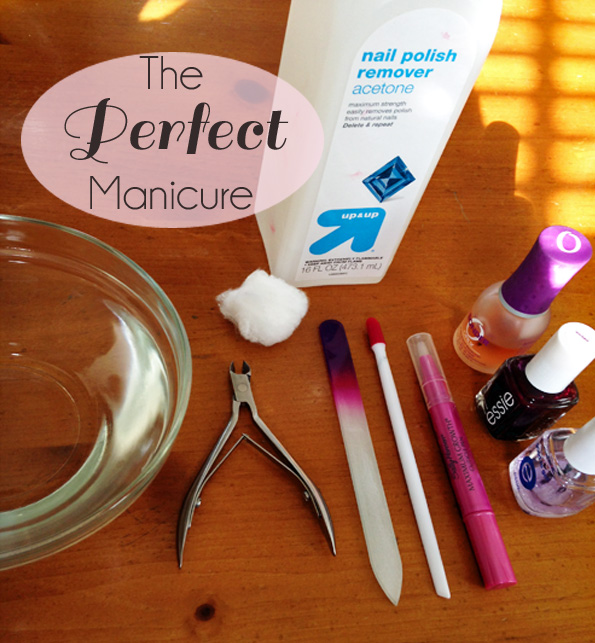
Every girl loves to have a great manicure. However, going to the salon every week is extremely time consuming and can get expensive. After much trial-and-error, I’ve perfected the art of the at-home manicure. Gals, get ready to have great-looking nails and save your hard-earned dollars in the process!
What you’ll need:
Small bowl of warm water with a splash of white vinegar
Remove any old nail polish from your nails. My favorite method for doing this is to rip 10 tiny pieces from one cotton ball, soak each one in acetone and place on each nail. Leave on for at least 10 seconds. Remove each piece of cotton by applying a firm, downward pressure and sliding off the end of the nail. Most (if not all) of the nail polish should come off in one swipe.
Step Two
Soak nails in the bowl of warm water and white vinegar for 5 minutes. The vinegar helps to soften your cuticles for easier removal (even though your hands will smell vaguely like a salad). Apply cuticle oil to softened cuticles.
Step Three
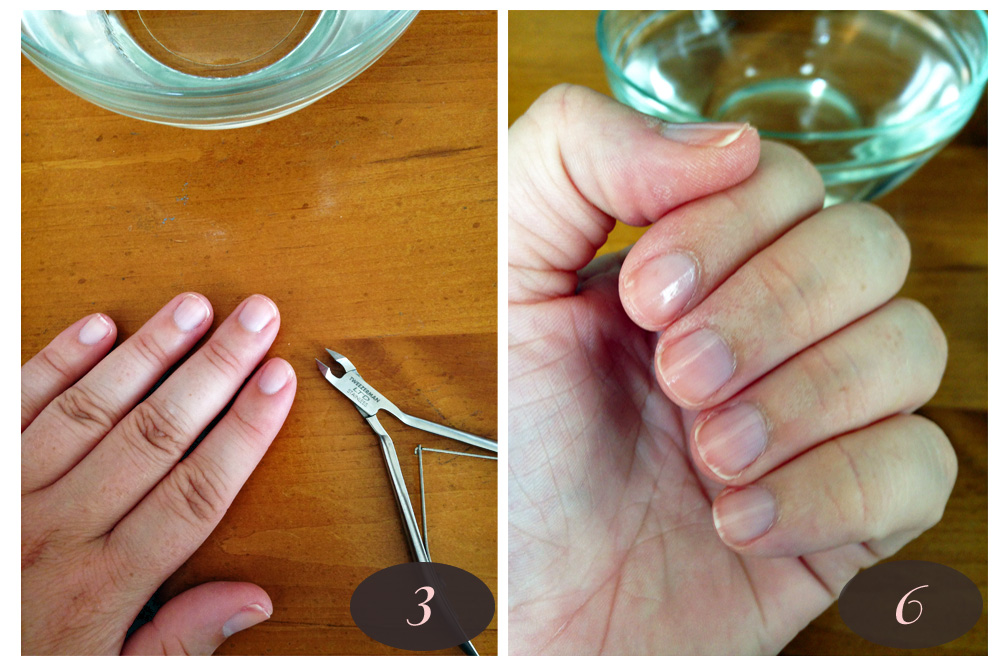
Gently push back your softened cuticles with a cuticle pusher or orange stick. Most of the time, this will be the sufficient grooming your cuticles need. For truly unruly cuticles, carefully trim with a sharp cuticle trimmer.
Step Four
Cut and file your nails however you like. I like to keep my nails short and square, but that’s just my preference!
Step Five
Swipe each nail with a cotton ball soaked in acetone. The acetone dehydrates the nail plate and removes any residual oils to allow the polish to adhere better to the nail.
Step Six
Paint on Orly Bonder base coat. Make sure to paint all edges and corners of every nail. Allow to dry for 30 seconds to a minute.
Step Seven
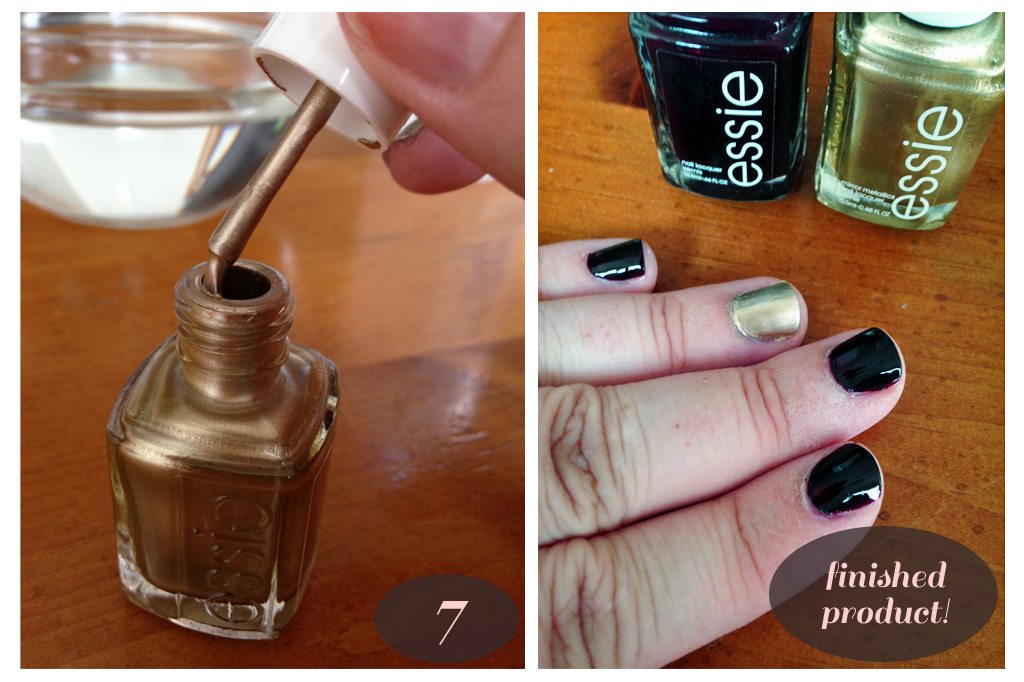
Paint a thin coat of color on each nail. To achieve a coat that’s not too thick, wipe the side of the brush close to you 2-3 times on the lip of the bottle. Then, wipe the blob of polish on the far side on the edge of the bottle. Apply a small dot of polish on the lower half of your nail and carefully push the dot towards the cuticle. After that, quickly spread the polish on the rest of the nail in 2-3 strokes. Repeat on the rest of your nails.
Step Eight
Repeat step seven, making sure to keep the second coat thin as well.
Unless you were blessed with otherworldly genes, pretty much every person struggles with skin problems at least once in their life… I know I did! I started getting acne in fifth grade (!) and it continued throughout high school. Most of the time my acne and skin problems were manageable, but I longed for a smoother complexion than the one I had. I finally figured out the secret, though. Get ready, because I’m going to share with you my skincare regimen that finally gave me flawless, problem-free skin.
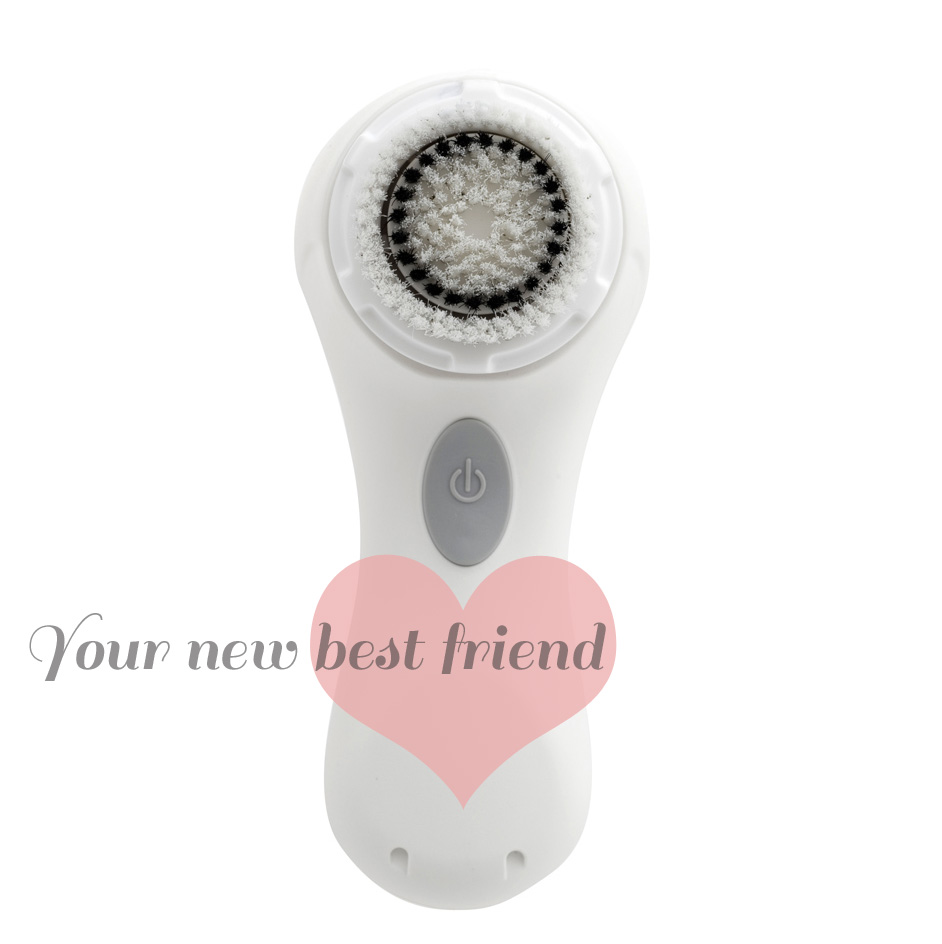
Meet your new best friend, the Clarisonic! Many of you have probably heard of it, but for those who haven’t, the Clarisonic is a skin-cleansing brush that is designed to cleanse your skin 6x better than your hands alone. Does it live up to those claims? Absolutely. This device has revolutionized skin care and has revolutionized my skin.
Breakouts? I haven’t had a bad one since I started using it. Blackheads? Completely eliminated. Dry skin? Gone. My skin is 100% healthier-looking, brighter, and more radiant all because of the Clarisonic (I’m not a paid sponsor, I’m just really enthusiastic about it). My pores have shrunk, my skin emits a dewy glow, and I never have to worry about how my skin looks without foundation.
I want every woman and man to feel as confident in their skin as I do. If you’re hesitant about the price, ask for it as a gift. I guarantee you it’s 100% worth every penny, though. Go buy it right now and tell all your friends about it.
Oh, and if you’re curious, these are the skincare products I use daily in addition to my Clarisonic:
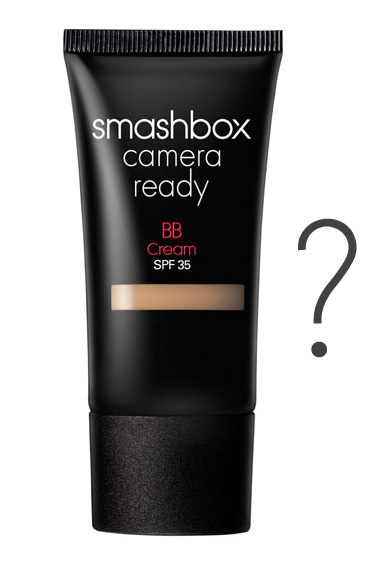
I gotta start this by saying that although I love luxurious cosmetics as much as the next girl, I try to be frugal with my money and only purchase truly quality products. I had heard so many rave reviews for Smashbox Camera Ready BB Cream, so since I was in the market for a new foundation, I walked over to Sephora the other night and purchased it.
I had high hopes for this baby, so I guess that’s why I feel so bummed that I didn’t like it. As usual, I did my research before buying it. I found many sources saying that this BB cream was the best on the market right now. I guess that’s probably why I’m so disappointed that this product didn’t work for me. Here’s why:
The shade range is pretty small (five shades). I tested out both the Light and Fair shades in Sephora and decided on the Fair shade, which is the lighter of the two, as the Light looked too dark on my skin. After a few uses, it became clear to me that Fair was far too fair for my skin. It made me look pasty and washed-out (not cute).
I expected more coverage. It claims that it’s medium coverage, but I would expect a more build able finish from a medium coverage formula. Even with more than one layer, the coverage remains light to medium (and my skin is relatively clear and problem-free, which brings me to my next issue…).
It made my skin look even blotchier for some reason. It could’ve been that the shade of BB cream was too light for my skin tone, but the blotches and unevenness were only emphasized on my skin.
By the end of the day, my t-zone was shiny. Even with my usual dusting of pressed powder in the morning, the greasies crept through this BB cream. Again, not a cute look to be sporting (and especially not something I want to worry about at work).
I had such high expectations for this BB cream based on the many great reviews it’s received. Again, what doesn’t work for some may work for others, so this is solely my opinion! Personally, I’ll be heading to Sephora tomorrow to return it (and then going to the M.A.C. store to buy this).
A few months ago, you could hardly go anywhere without hearing about the Beauty Blender makeup sponge. Beauty gurus on YouTube hailed it as the best and only way to apply your liquid and cream foundation. Now that the hype has died down, my question remains: is the Beauty Blender all it’s cracked up to be?
For those of you who don’t know, the Beauty Blender is a pink, egg-shaped, non-latex sponge. It also costs upwards of $30 at places like Sephora. It claims to blend your liquid or cream foundation into an airbrushed finish to leave you with flawless, glowing skin. But I’m sure I am not the only girl who did a little bit of research before running out to Sephora to spend 30 hard-earned dollars on a sponge. I’m here to give you the facts so that you can make an informed decision for yourself.
The thing about makeup companies is this: there are really great, high-end products out there that really are worth the money. There are also many, many wonderful dupes to high-end products that are virtually the same product without the brand name. Many times, one company will make a product and a different company will put their brand on it. This is called private labeling. Private labeling only becomes a problem when makeup companies jack up the price of their product simply due to their brand name. So here’s the scoop: you can buy the exact same product without a brand name for a fraction of the price.
I found a Beauty Blender dupe at Walgreens for $6. It is a fantastic product. This was an absolute no-brainer for me. Gals, run as fast as you can to Walgreens and pick one up! You won’t regret it, I promise.
XO, J
P.S. To use the sponge properly, hold under running water and squeeze 10 times (it expands). Then, wrap in a towel and squeeze out the excess water. Apply your liquid or cream foundation with the sponge in a buffing motion and you’ll look flawless!